Jump to Mobile
There are four types of perspective guides:
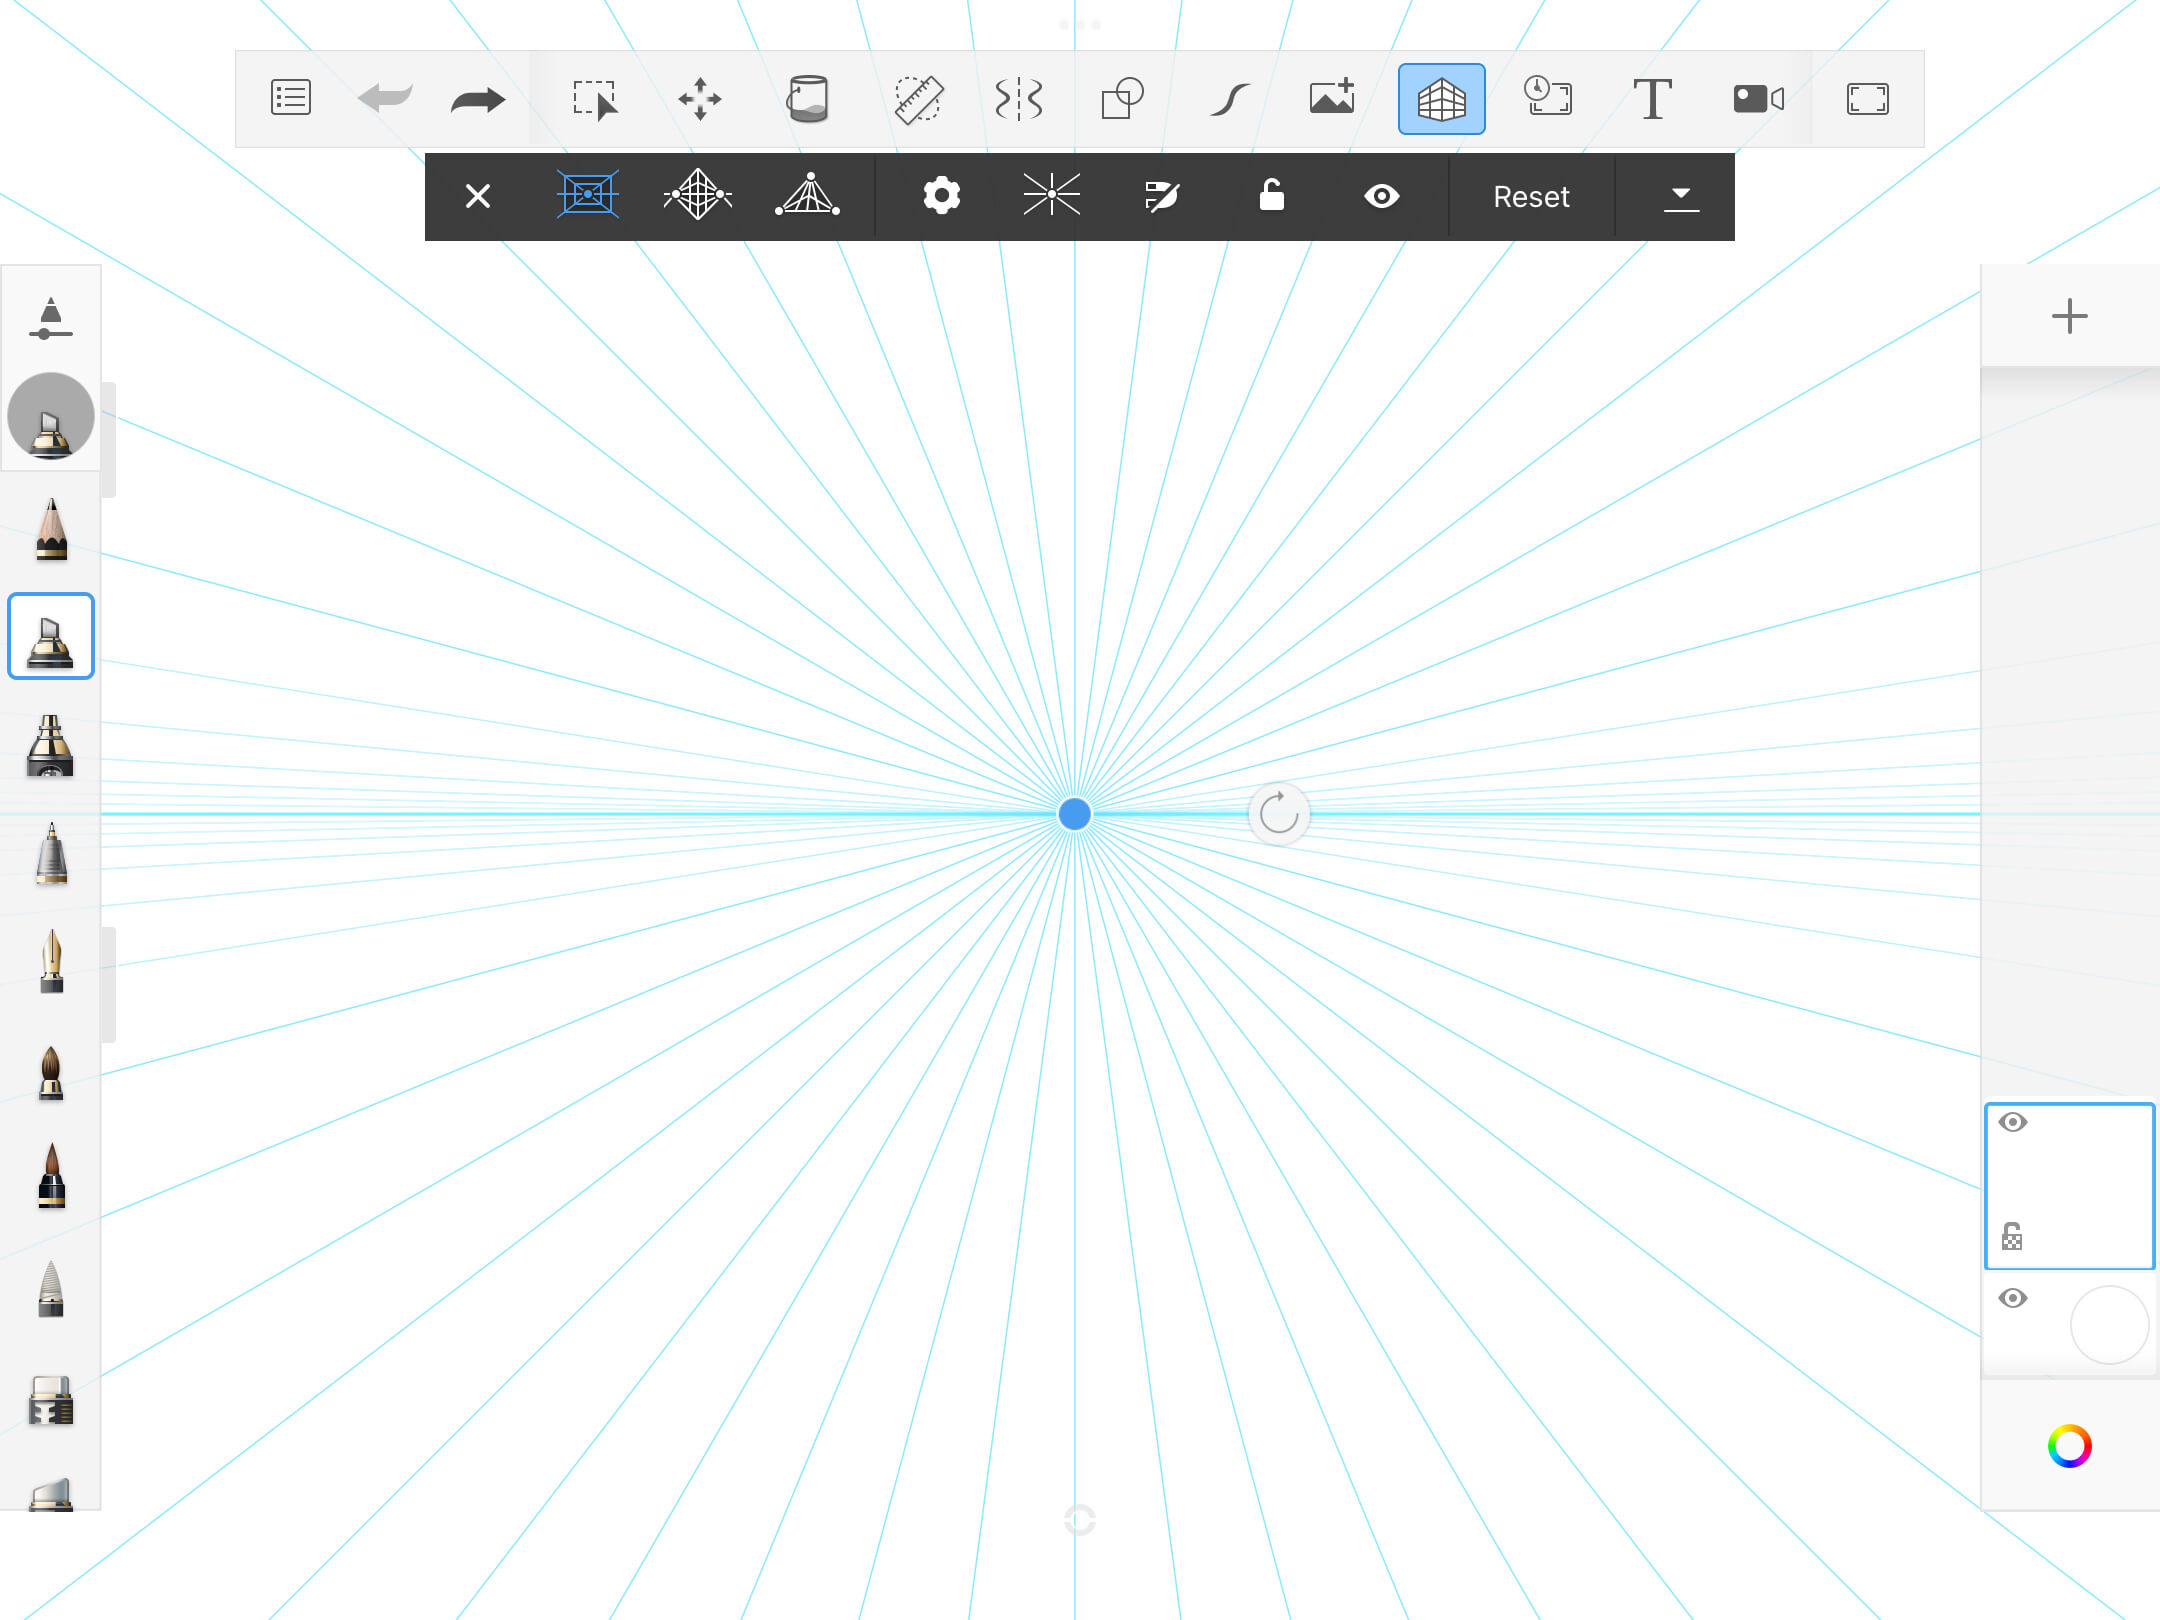
 1 Point Mode
Create an image with a single vanishing point and a horizon line. Draw images that appear as if you are viewing them head-on, such as looking down a street, train tracks, hallway, or at a building. Drag to reposition the vanishing point and horizon.

 2 Point Mode
Create an image with two vanishing points and a horizon line. Draw images of an object with a corner facing you, such as the corner of a building. The walls will recede to the vanishing points.

 3 Point Mode
Create an image with three vanishing points and a horizon. Draw images of an object that you are viewing from either above or below. When you mouse over or drag a vanishing point, a horizon line (blue) and triangle connecting the three points (light blue) appears.

 Fisheye Mode
Only available with Sketchbook Pro for desktop
Create a panoramic or hemispherical image with a very wide angle of view. Draw images of a scene viewed from a convex mirror or lens.
This mode has five vanishing points: left, right, top, bottom, and center. The grid is composited of a horizon line, vertical line, and circle. Curves intersect at the vanishing points. Moving the center point moves the entire grid. Moving an edge point changes the circle’s radius.

Perspective guide tools
Snap and Unsnap
- When enabled
 , strokes will be straight and constrained to being parallel to the horizon, perpendicular to the horizon, and to the vanishing points.
 - When disabled
 , draw freehand curves, etc., without being constrained to straight lines. The guides are a reference only and do not affect the stroke.
Horizon Line
- You can reposition the blue horizon line by tap-dragging the vanishing point(s).
- NOTE: If the horizon line won't move, disable Lock perspective guides.
Vanishing points
The selected Perspective Guide sets the number of vanishing points. Therefore, 1 Point Mode will have one, 2 Point Mode will display two, and so on.
To move a vanishing point, tap-drag and reposition it. If the vanishing point cannot be moved, tap to unlock the vanishing points, then tap-drag them into position.
Vanishing points can even be moved off the canvas to create a less dramatic camera angle. To do this, zoom out of the canvas, then drag and reposition your vanishing points.
Locking vanishing points
- When locked
 , the vanishing points are locked into place and there is no worry of accidentally moving them.
 - When unlocked
 , they can be repositioned.
Show and Hide perspective guides / horizon line
If you don't want to see the perspective guides on the screen, tap ![]() . The guides are still active, but the lines are not visible. Tap
. The guides are still active, but the lines are not visible. Tap ![]() to display the lines again.
to display the lines again.
Accessing the Perspective tools in Sketchbook Pro
Tap ![]() to access the Perspective guides.
to access the Perspective guides.

The Perspective cursor
When you select a guide, the cursor changes to a dashed, three-line cursor.

As the cursor moves around the canvas, one of the dashed lines rotates to always point at the vanishing point.

If you draw in the general direction of the vanishing point, your stroke will automatically snap to it.
Saving perspective guides
Only in Sketchbook Pro on desktop
The file format determines whether the location of the perspective guide is saved in the document, and will reappear in the same location when the file is reopened.
To maintain the last location of the perspective guide, the file must be saved as a Sketchbook TIFF. Perspective guide locations are not maintained if you save your file as PSD
Perspective Guides in Sketchbook for mobile devices
In the mobile (Android and iOS) versions of Sketchbook, you will have the following tools:

NOTE If you don't see the Perspective Guides icon ![]() in the toolbar, tap-drag the middle of the toolbar to the left. This will expose the icons on the right end of the toolbar, particularly when using your device in portrait mode, or a smaller window or side-by-side mode.
in the toolbar, tap-drag the middle of the toolbar to the left. This will expose the icons on the right end of the toolbar, particularly when using your device in portrait mode, or a smaller window or side-by-side mode.
Customize Grid
Tap ![]() , then set the following parameters:
, then set the following parameters:
- Density - Sets the density of lines radiating from the vanishing points to create the perspective grid. The higher the number, the more grid lines.
- Opacity - Sets the visibility of the grid. The higher the number, the more visible the grid lines.
Infinite and Constrained Grid
- Infinite Grid - the lines of the grid extend out, infinitely, from the vanishing point.
- Constrained Grid - the lines of the grid are constrained within a frame.
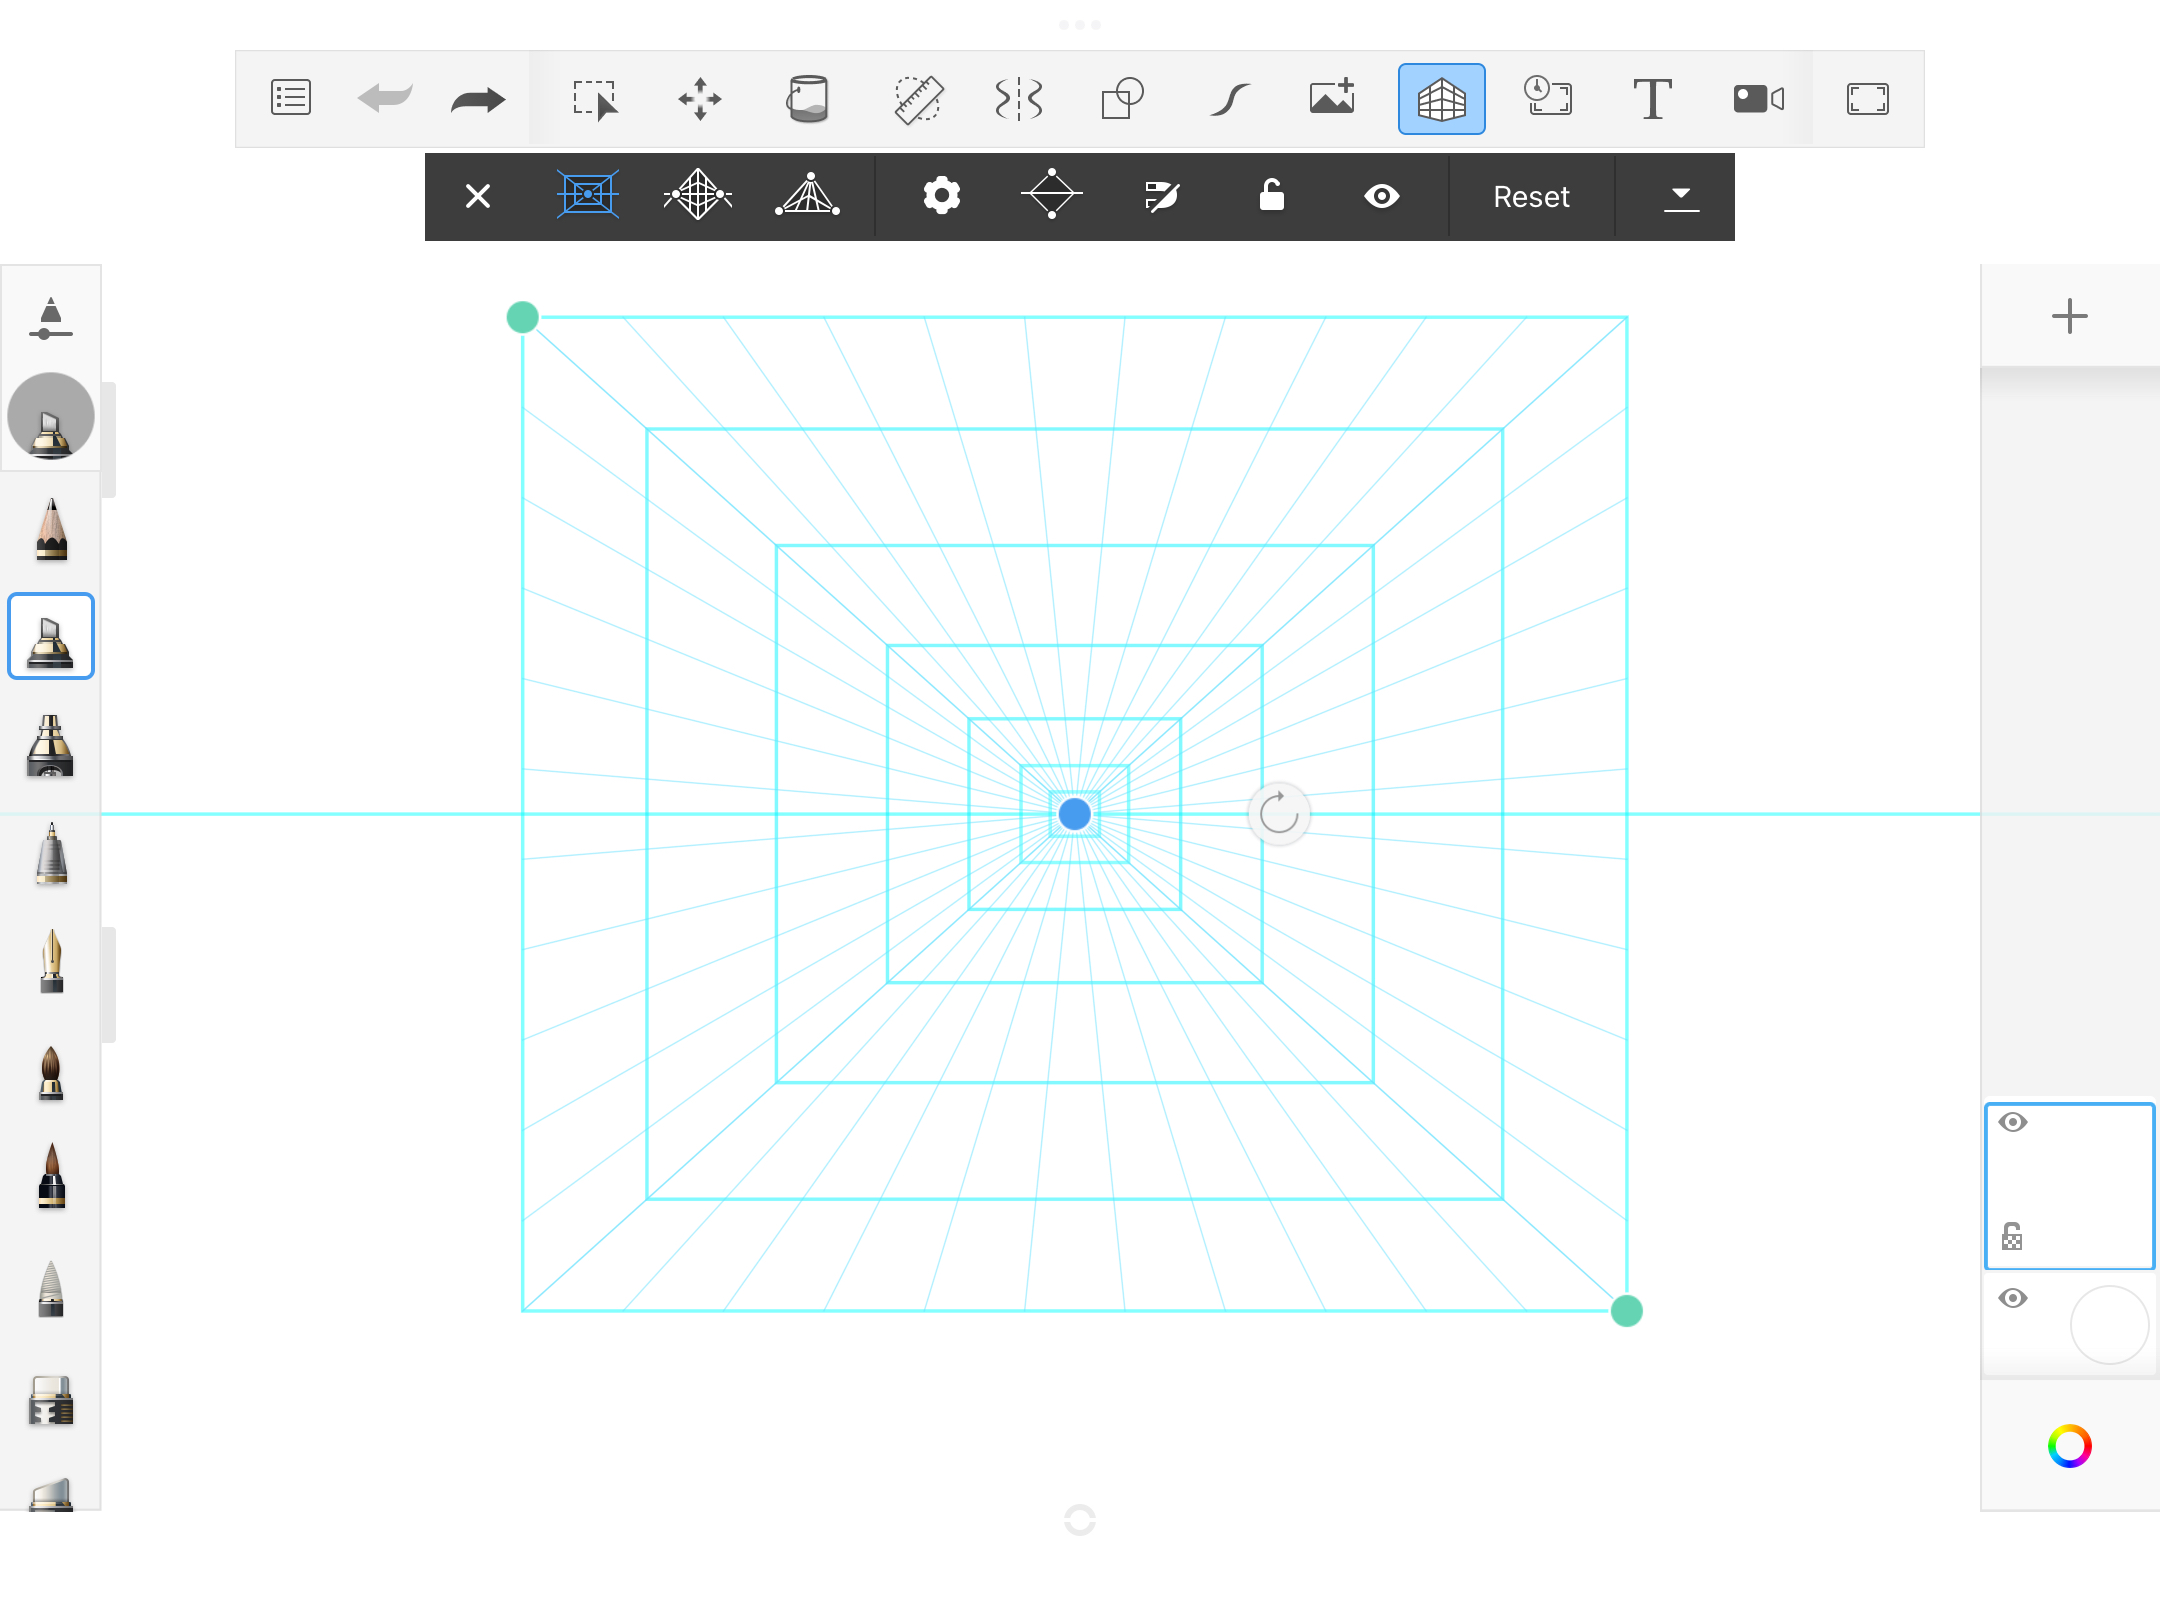


Tap-drag the green handles to change the size and shape of the frame.
Resetting perspective guides
Perspective guides will maintain their location between canvases. If you want to reset the guides to the default, tap Reset.
