Sketchbook has a powerful brush engine that offers many ways to customize brushes to fit your style, or for you to create your own unique brushes.
Some people create their own custom stamp and texture brushes, others like to duplicate a favorite brush so they have multiple versions of the brush ready to go with different settings. These are just a few examples of why you might decide to customize your brushes to improve your workflow.
Learn more below about the advanced brush settings you may want to customize, and then the step by step of doing so in Sketchbook Pro and Sketchbook for mobile devices.
Setting a brush stamp and texture
In Advanced brush properties, you will see a section called Nib. This is where you adjust the brush stamp – it’s Edge, Shape, and Texture.

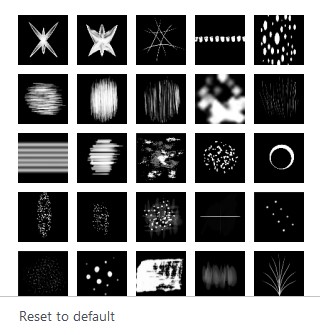
Using Shapes
When activated, Shape applies the selected shape to the brush, but with no assigned color. Each time the brush is used, it will apply the shape in the active color, unless With Color is used (see below).
Changing the edge of your brush

Use the Edge slider to make the edges of your brush softer or sharper.
- For a precision brush, you’ll want to set Hardness to a high value.
- For a pastel-type brush, you'll want to set Hardness to a small value.
Defining the shape of your brush
If you read How to capture textures and shapes, the example uses Shape to create a chain brush. There are three options for defining the shape of your brush nib:
- Tap the arrow
 at the bottom corner of the default shape to access a list of brush shape options.
- Choose Import to import a new shape image.
- or choose Capture to take a screen capture of something on your screen (only available in Sketchbook Pro on desktop).
 at the bottom corner of the default shape to access a list of brush shape options.

Constrain the brush shape using With Color

If your imported shape is a color image, enable With Color. This will cause the brush to only use the stamp's imported color, leaving it unchecked means the brush will always use the current active color in the Color Editor. Some examples of brushes using With Color are the Leaves and Colored Pencils in our Extras.
When would I use Ignore Edge?
You can also decide to ignore the edges of the image or capture. By enabling Ignore Edge, your brush stamp shape will not be round.
You would want to use Ignore Edge with non-circular shapes - such as the leaves example above- to avoid having them be cropped to a circle. You might also use Ignore Edge if you want your shape to flow tightly around corners, such as using it in conjunction with the Ellipse tool.

Creating your own brushes in Sketchbook Pro for desktop
Create more brushes by copying a brush and changing its settings or creating a Do-It-Yourself brush.
- In the Brush Library, Tap on a brush set to select it
- Tap-hold
 and choose
  to add a brush
 - Select a brush type to base your new brush on. By default, Current Brush is selected which duplicates the type of the active brush. Try starting with Standard.
- Tap Create. A Do-It-Yourself Brush icon
 will appear in your brush set.
 will appear in your brush set.
Once you create a Do-It-Yourself brush, double-tap the icon to open Brush Properties to customize it:
- Adjust the pressure sensitivity – In the Advanced tab, set brush radius and opacity according to the amount of pressure applied to the stylus. The brush size values are a rough approximation of pixel size, but can vary.
- Change the opacity – In the Advanced tab, set opacity to vary brush opacity as the stylus pressure changes. To have the brush randomly changed opacity as you lay down strokes, see Randomize.
Creating your own brushes in Sketchbook for mobile devices
Creating your own brushes requires the Premium Bundle
Create more brushes by copying an existing brush and changing its settings.
- Double-tap a brush in the Brush Palette to open Brush Properties, then tap the menu
 and choose Duplicate. You can also duplicate the active brush from the menu in the Brush Library
  .
. - The new brush will be called "Duplicate" and will be added next to its parent brush in the Brush Library
- In Brush Properties, tap the menu again to rename the brush, and/or change its icon.
- Tap over to the Advanced tab of Brush Properties to customize the new brush. Adjust the pressure sensitivity – set brush radius and opacity according to the amount of pressure applied to the stylus. Apply your own custom texture or stamp images.
