This guide is provided as a basis for deploying enterprise subscriptions of Sketchbook Pro via Intune.
Sample scripts are available to help with the installation, uninstallation, and detection of the application. Additionally, these scripts show how to license and accept the EULA post installation so that end users are not responsible for these steps.
These instructions are for installation of Sketchbook Pro subscriptions purchased directly from Sketchbook, Inc. They are not compatible with single-seat purchases of Sketchbook Pro through the Microsoft Store.
First, download the Sketchbook Pro installer from the license management portal. We use LicenseSpring for license management. The purchaser will have received an email from LicenseSpring when their purchase was completed, with instructions on how to access the portal. If you need help locating these login instructions, please contact sales@sketchbook.com for assistance.
Obtain the version of Sketchbook Pro that you would like to install. This installer is in the msixbundle format and should have a name similar to: SketchbookProInstaller_9.3.24.7_x64.msixbundle
Create folders for Intune package creation
You will need Input and Output folders. So as an example create the following folders:
C:\Intune
C:\Intune\Input
C:\Intune\Output
Download the Microsoft Win32 Content Prep Tool
You will need to use the Microsoft Win32 Content Prep Tool to prepare the installer for deployment. Go to the following link to download the Source code (.zip) file, and then place it in the Intune folder: https://github.com/microsoft/Microsoft-Win32-Content-Prep-Tool
Make sure to download the latest release.
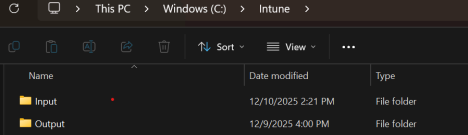
Once you have downloaded the zip, extract its contents and copy the IntuneWinAppUtil.exe file into the Intune directory you created earlier. You should now have a directory structure like the following:

Copy the msixbundle, install.ps1, uninstall.ps1, and detect.ps1 files into the Input folder. You should now have:
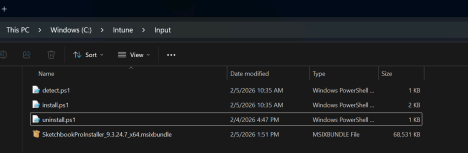
Note: The sample install, uninstall, and detect scripts are set up to handle different version numbers in the msixbundle name. So do not worry about the version number in our example being different from the version currently available to you.
Create the Intune deployment package
Launch IntuneWinAppUtil.exe located in the Intune folder. Provide the following inputs based on your own Intune directory location:
 This will generate an install.intunewin file in the Output folder.
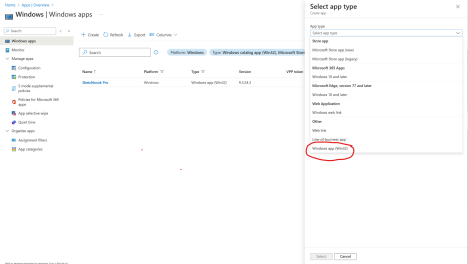
Log in to the Intune admin center and add a new Windows app Deployment: Make sure to select the app type of Windows app (Win32).
App Information
Select the install.intunewin file you recently created in the Output directory.

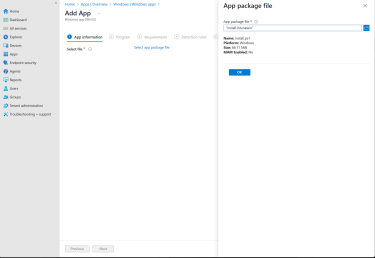
Update the name, description, publisher and Icon (if desired). 
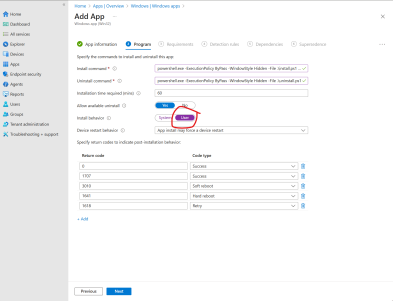
Program Page
Here you need to provide the command necessary to install and uninstall the app. Also, make sure to change install behavior to be User.
If you want to activate the application during deployment you will need to pass in the license key to the install script as follows:
powershell.exe -ExecutionPolicy ByPass -WindowStyle Hidden -File .\install.ps1 -LicenseKey "XXXX-XXXX-XXXX-XXXX"
For the uninstall command use the following:
powershell.exe -ExecutionPolicy ByPass -WindowStyle Hidden -File .\uninstall.ps1
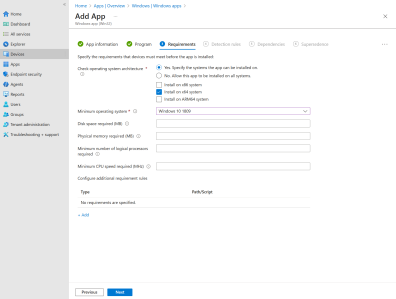
Requirements
Set the following settings:
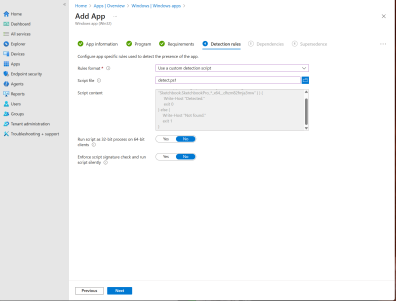
Use a custom detection script and load the detect.ps1 script.
NOTE:
The detect.ps1 sample provided has a line that specifies the minimum target version. You must update this value to match the version you want installed on the machines. If you do not, the detection script may inform Intune that you already have a version installed that is greater than the minimum version and the application will not update.
# Define the version you are upgrading to
$TargetVersion = [version]"9.3.24.6"
You can hit 'next' on both of these pages to skip.
Assignments
Set up the Required, Available, and Uninstall assignments to meet your requirements.
Creation
Create the deployment.
