Jump to Mobile
When you first open Sketchbook you will see the default UI. For all versions of the app, there will be a canvas and toolbar. The rest of the interface will be slightly different depending on the platform and version you're using. See the sections below to familiarize yourself with the interface and how it works.
Basic UI elements in Sketchbook Pro for desktop
Get started with an introduction to the interface and the most basic interactions. When you open Sketchbook, by default, you'll see the canvas, lagoon, toolbar, brush and color pucks, and Brush Palette.
Use hotkey shortcuts and marking menus to access tools and functions quickly.
To change your view and navigate around your canvas, hold down the Spacebar key to activate the puck.

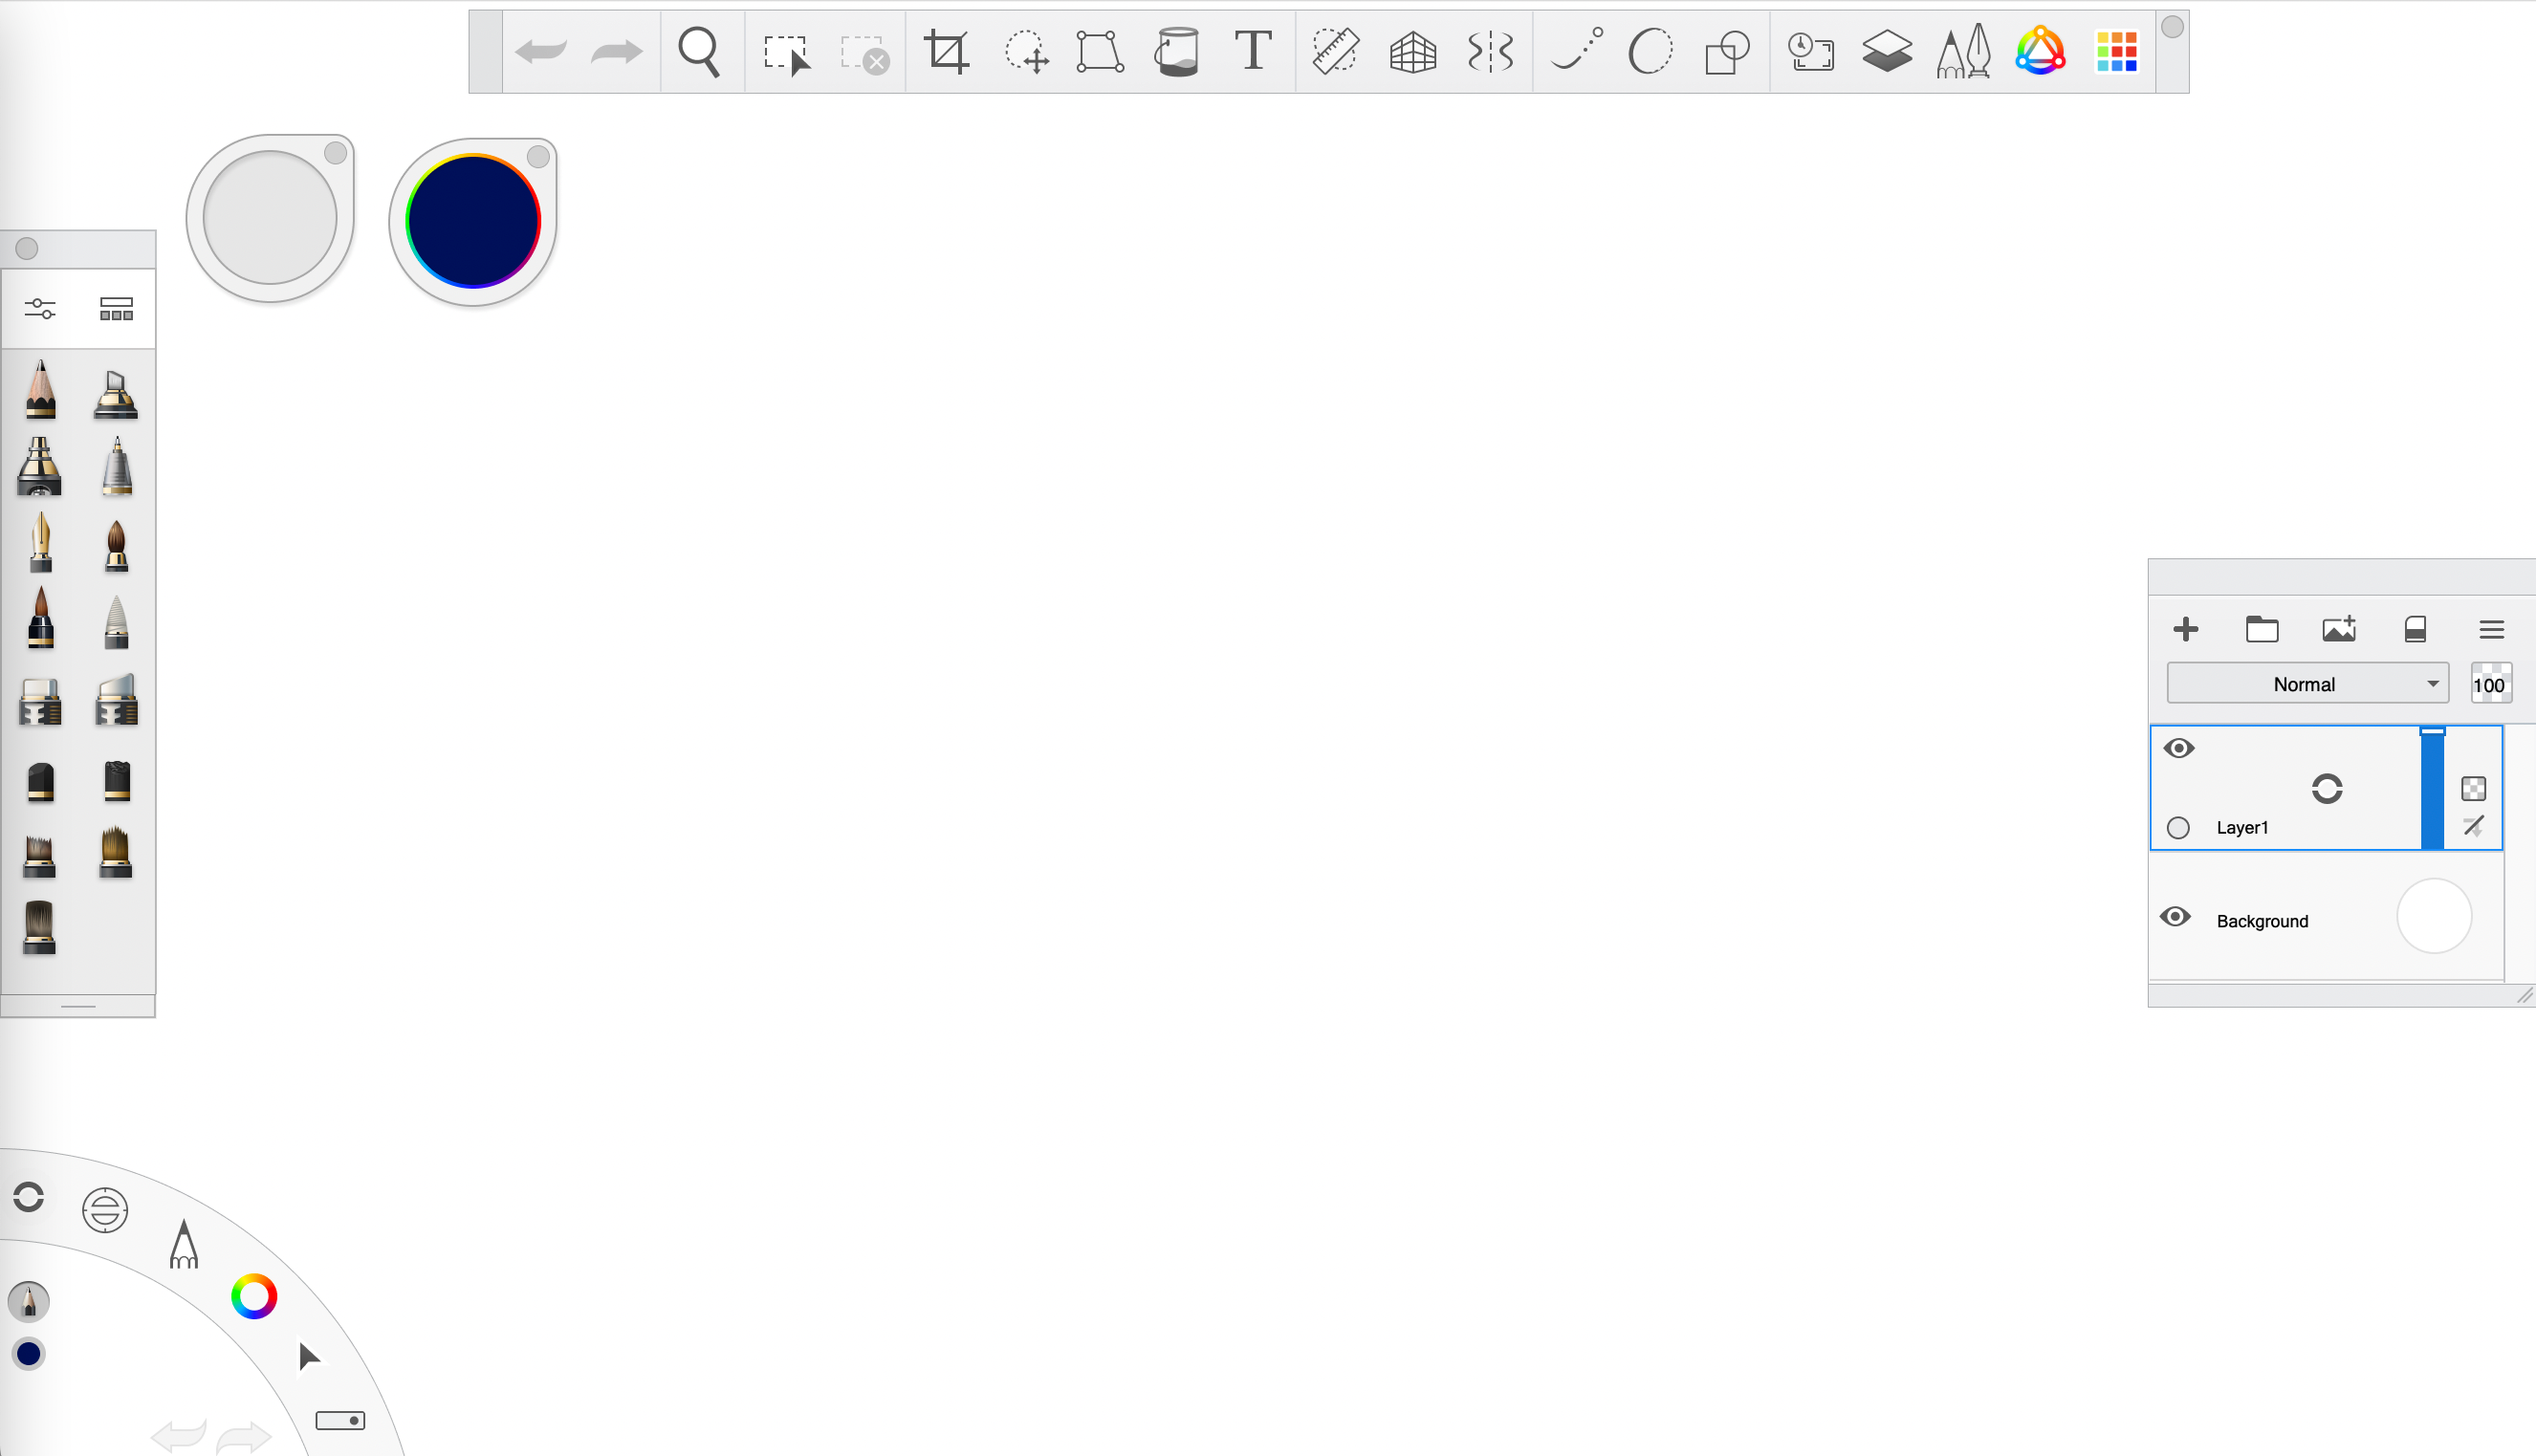
Lagoon tool summary
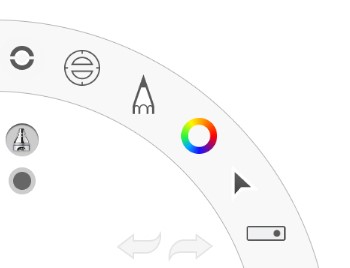
The Lagoon is the round UI element that is found in the bottom left corner of the screen by default, though you can change its location. It is a hub for many useful tools in Sketchbook.
The Lagoon is driven by gestural movements. To view the tools in a lagoon marking menu, tap an icon to expose the tools in that category. With your stylus (or right mouse button) down, drag to the tool you want to select. When the icon is highlighted, lift your stylus (or release your right mouse button).
You can customize the tools that appear in the Lagoon marking menus in Preferences.
- Interface controls
- View controls, transform tools, rulers, layers, & vertical & horizontal symmetry
- Brushes & palette
- Colors & Transparent Color
- Selection, editing, & layer transform tools
- Open, Save, New, Next & Previous Image
- Shows current tool
- Shows current color
- Undo/redo
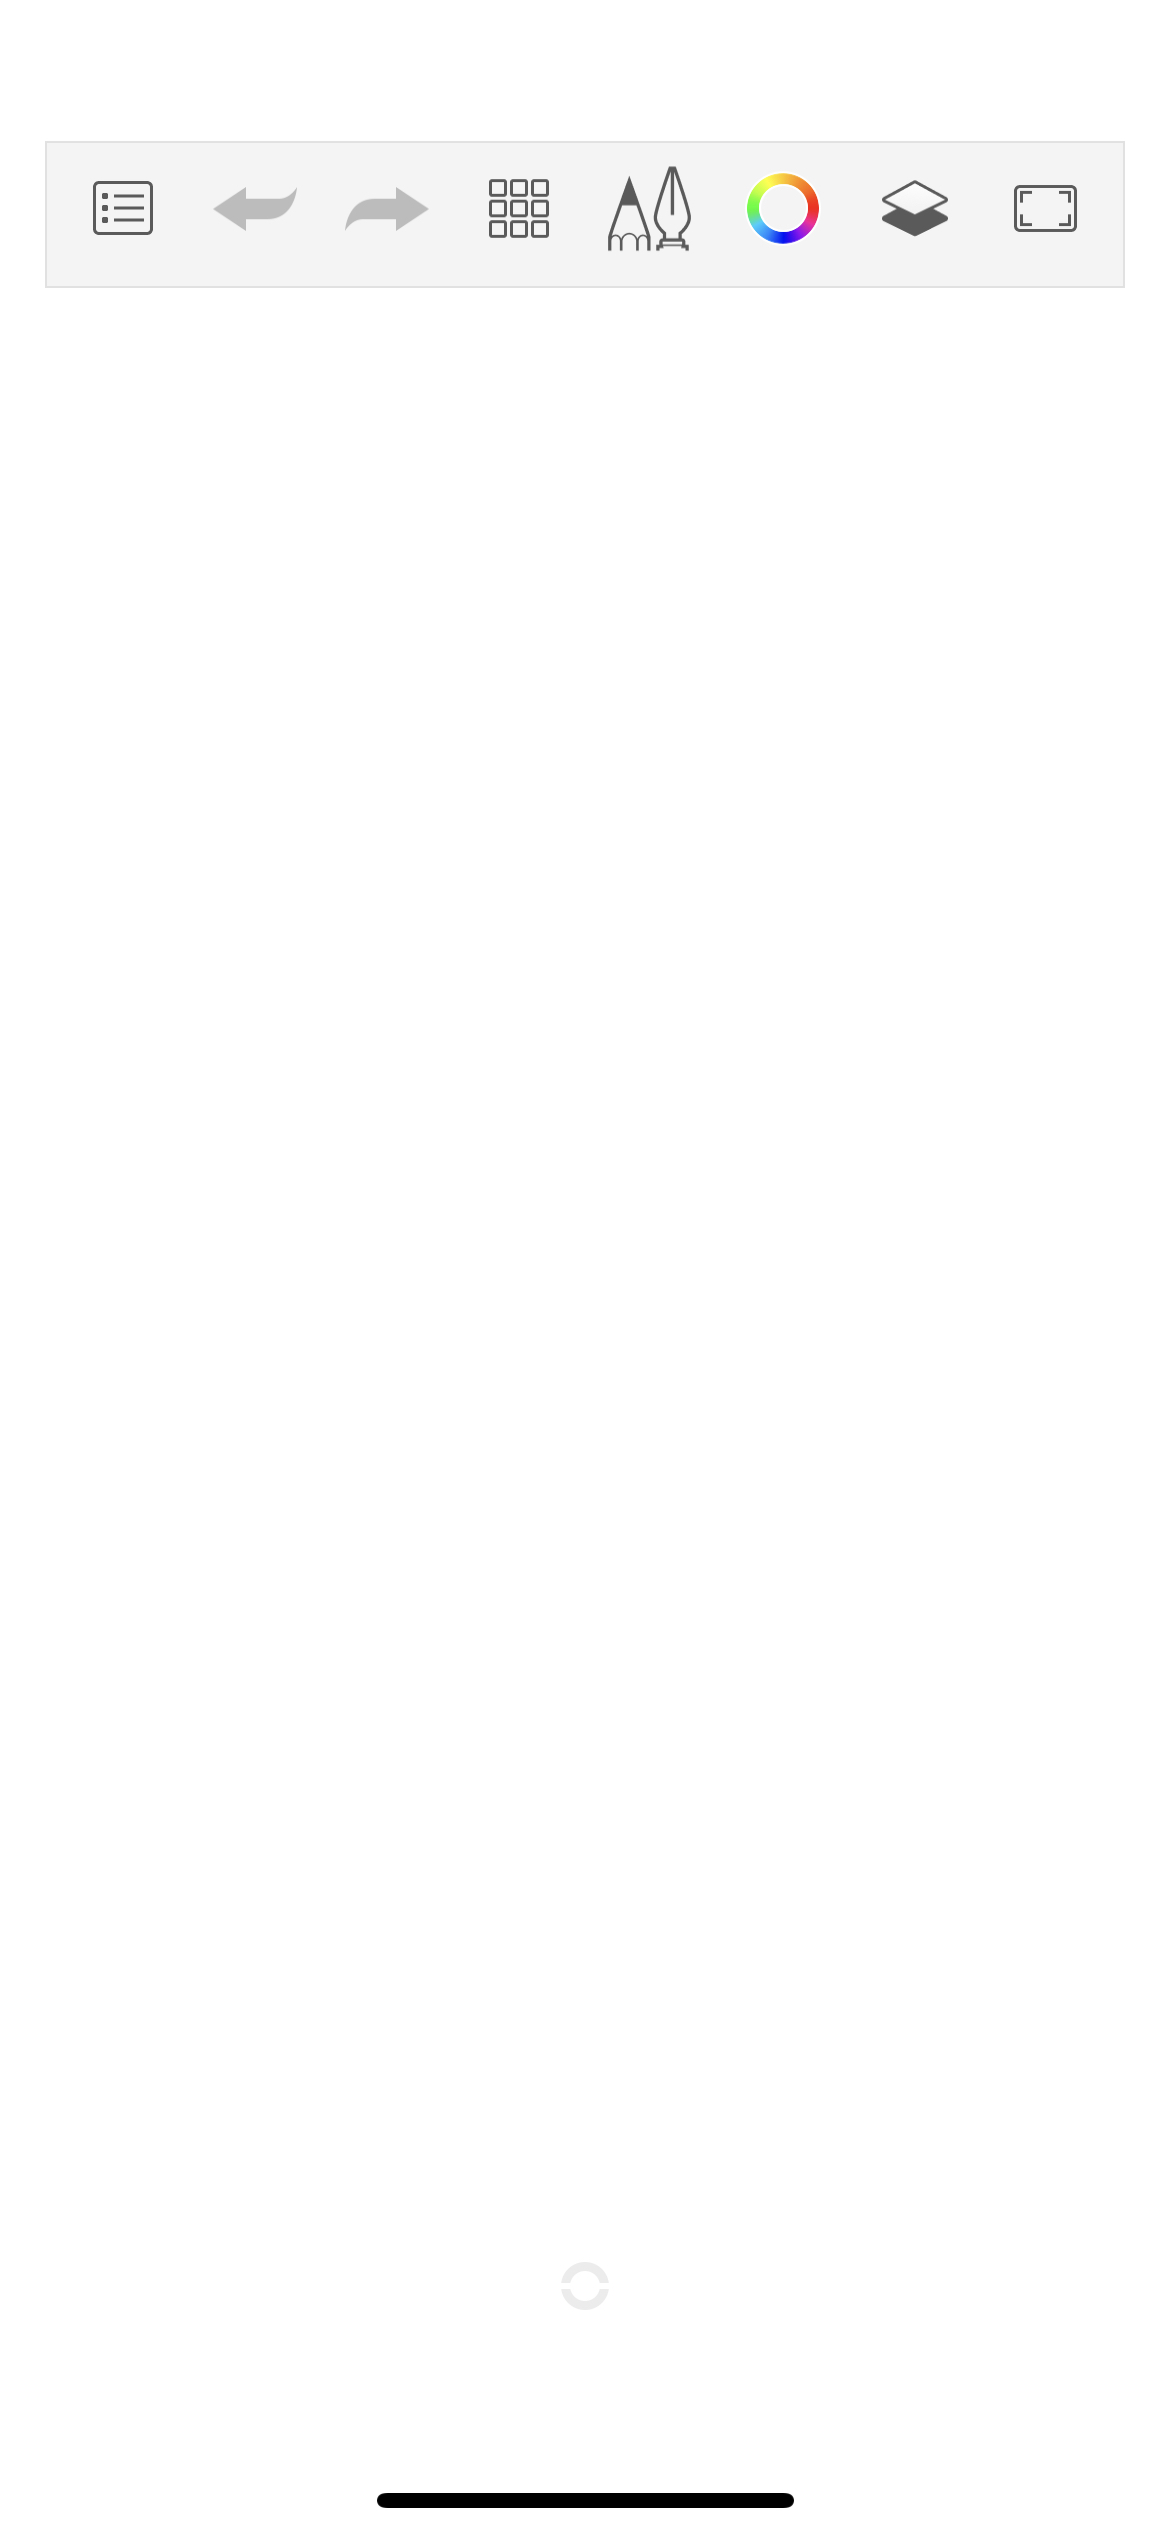
Basic UI elements in Sketchbook for mobile devices
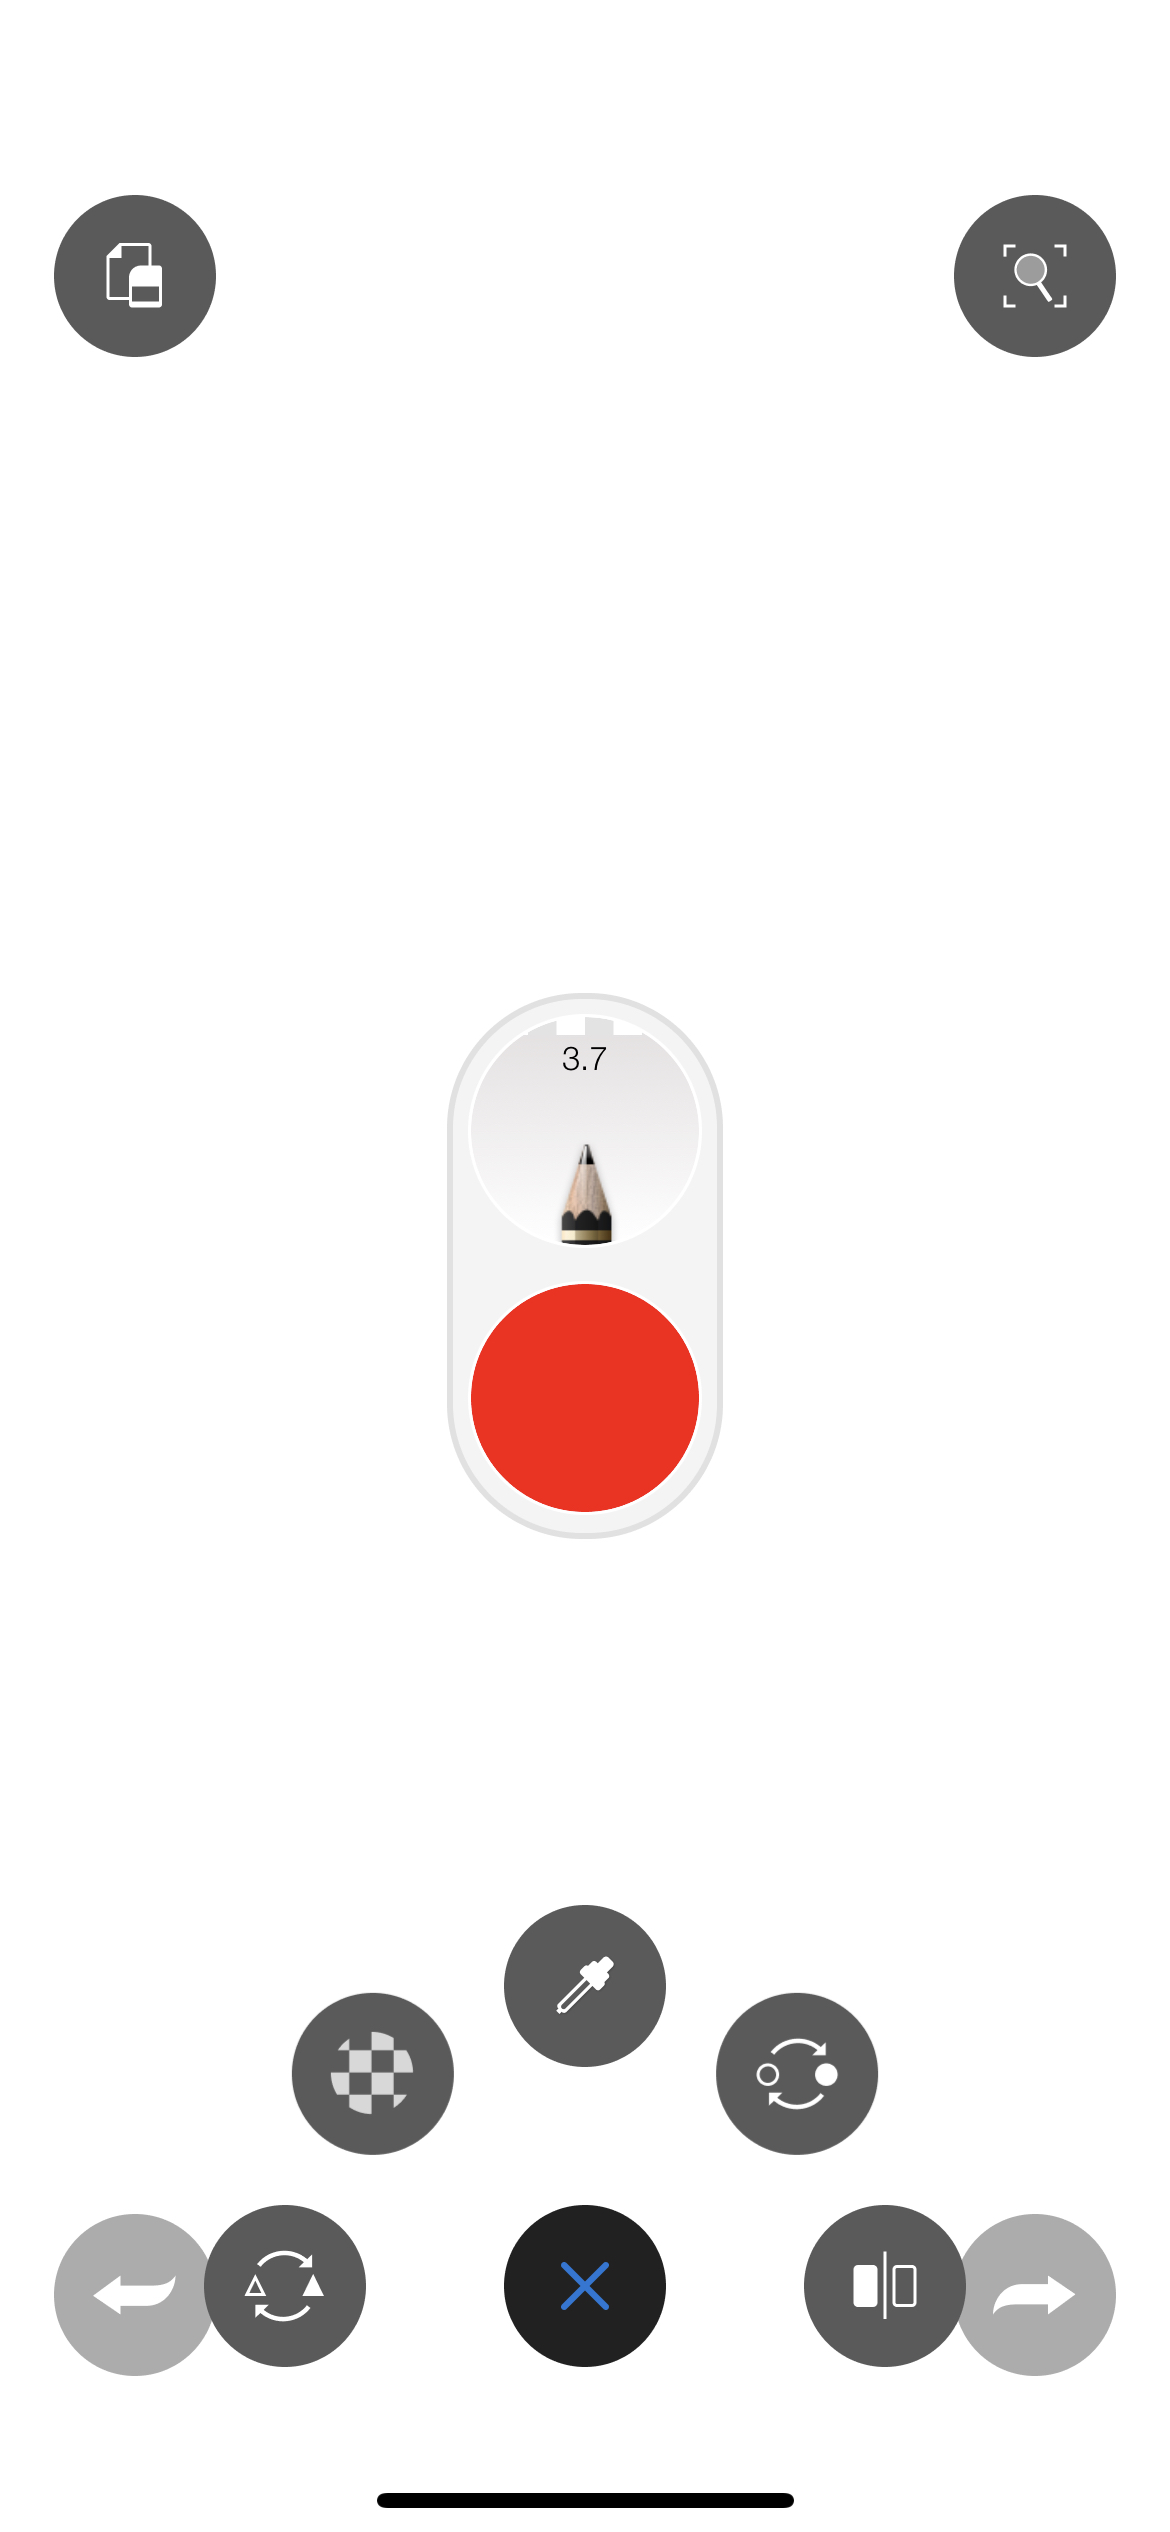
To get the most out of Sketchbook, you should become familiar with its basic UI, such as the canvas, toolbar, Double Puck, marking menu and corner tools.
Once you are familiar with the tools, you may prefer to draw with the UI is hidden.
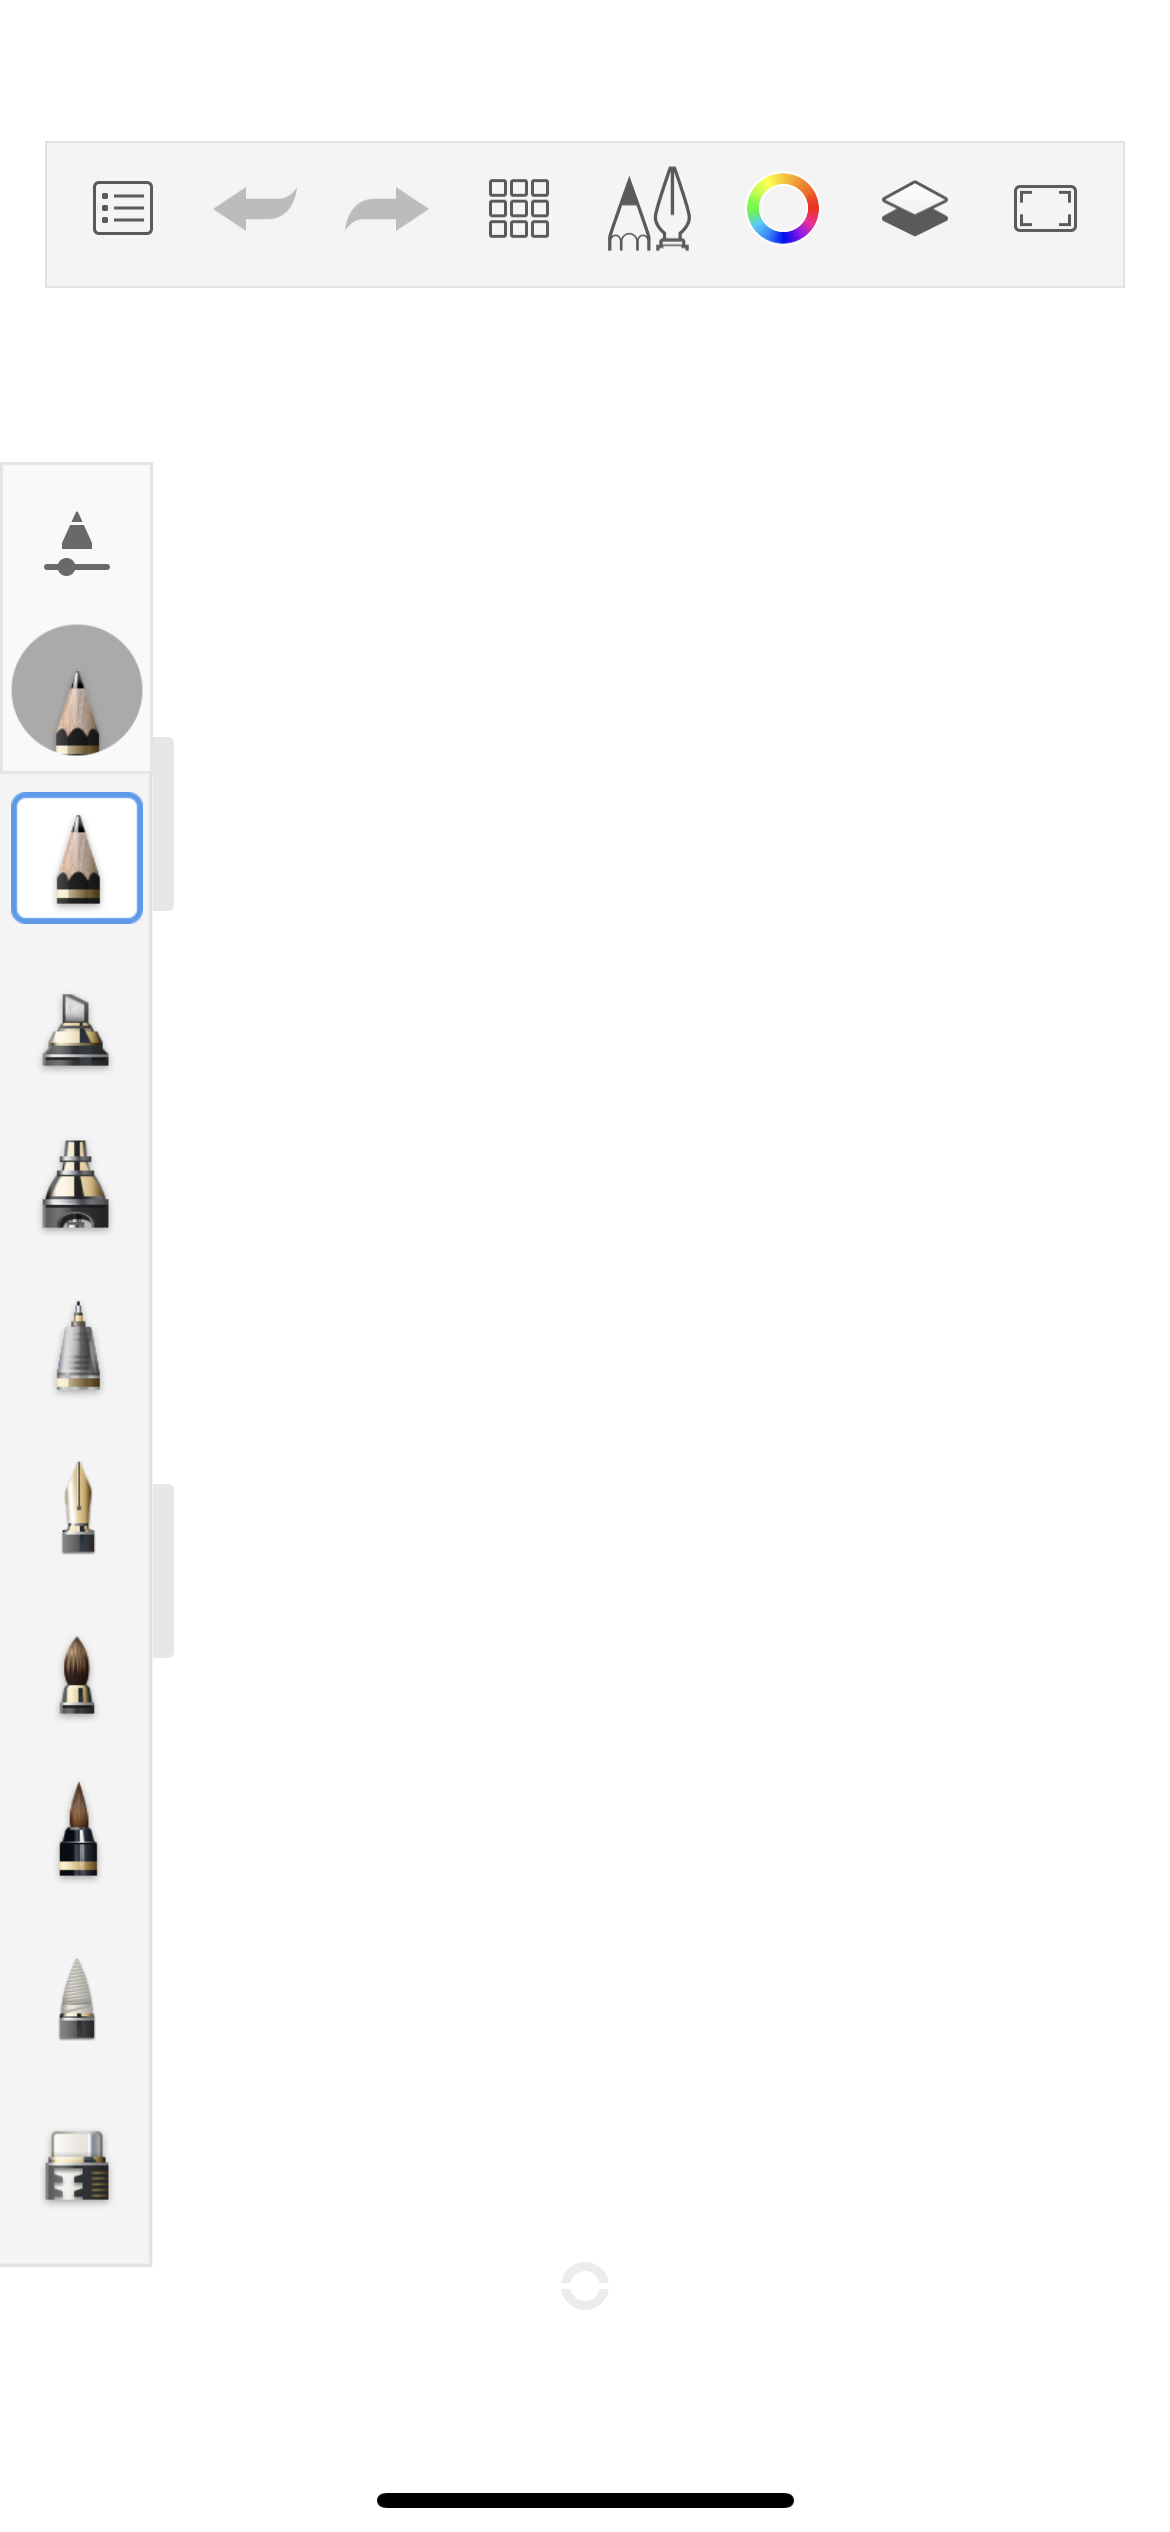
Tablets

You will see the toolbar, a full brush palette which gives you access to the customizable Brush Library, the Double Puck which launches the Color Editor, and the Layer Editor with blend modes.
Handheld devices
You will see a toolbar and the marking menu. Starting in Sketchbook version 6, you also have the option to turn on the Brush Panel in Preferences.
Marking menu
Use ![]() (the marking menu) to access an assortment of tools, as well as the corner tools without going to the toolbar. If you are working with the interface hidden, the marking menu provides access to a host of tools without unhiding your interface.
(the marking menu) to access an assortment of tools, as well as the corner tools without going to the toolbar. If you are working with the interface hidden, the marking menu provides access to a host of tools without unhiding your interface.
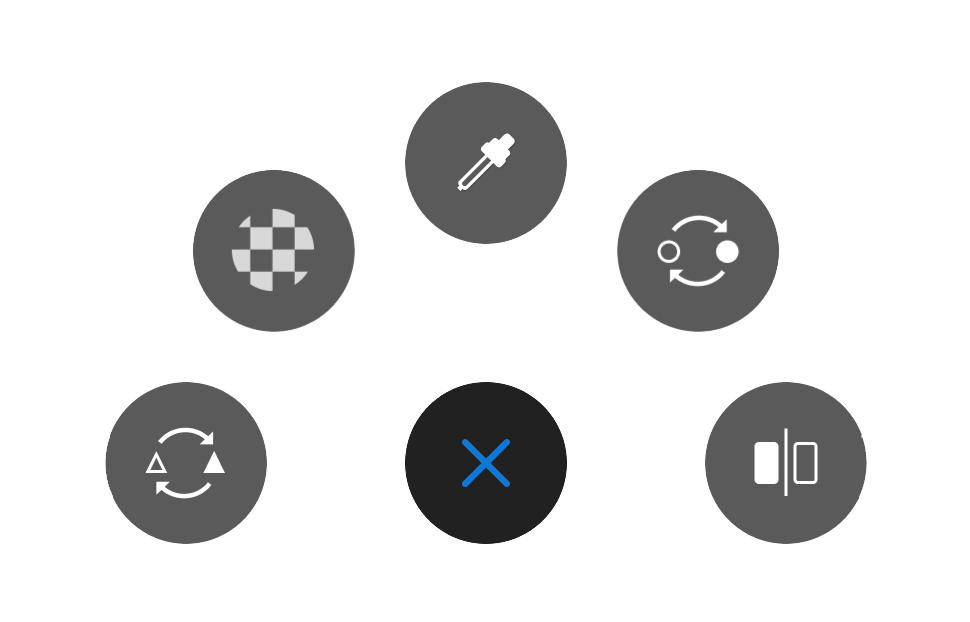
The Marking menu includes tools for switching between the current and last brush, Transparent Color, selecting a color from your screen (color picker), accessing the Double Puck (on tablet) or the last color (on handheld) and flipping the canvas.
On handheld devices, tapping the marking menu will also open the Double Puck.
In Sketchbook version 6, you can customize the marking menu tools in Preferences.
Corner tools
Access a corner tool by double-tapping a corner of the screen.
Tap ![]() , the Corner tools are visible.
, the Corner tools are visible.
The default corner quick tool mappings are:
 (Clear Layer) Top left
 (Fit To View) Top right
 (Undo) Bottom left
 (Redo) Bottom right
If you want to customize your corner tools, see Customizing the corner tools.