Jump to Mobile
In the examples below the left side shows an adjustment option applied to the original image (right side). The version of Sketchbook you are using will determine the tools available for color adjustment.
Brightness/Contrast
Make colors pop. Increase the contrast to make colors richer. Decreasing it to wash them out for images that text can be placed over top. Increase brightness to bring out details from darker areas. Decrease it to melt away darker aspects of an image and shift the focus to things that are bright.

Hue/Saturation
Change the color range, increase or decrease the purity of a color or brilliance of the colors. Adds/subtracts color (hue) or adjusts the relative amount of color (saturation) in each pixel.

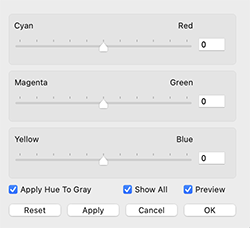
Color Balance
Remove unwanted color casts by adjusting the cyan, red, magenta, green, yellow, and blue in each pixel.

Grayscale
Change a color image to one that uses black, white, and various shades of gray.

Invert
Switch the contrast of an image. Change black elements to white and white to black to create an opposite image. Converts color information for each pixel to its complementary color.

Blur
A Gaussian blur that reduces the visible detail in the image. Blur adjustment is currently available in Sketchbook on mobile devices and coming soon to Sketchbook Pro on desktop.

Sharpen
Finds the edges in the image - areas where adjacent pixels are significantly different - and enhances the differences to generate the effect of making the image crisper. Sharpen adjustment is currently available in Sketchbook on mobile devices and coming soon to Sketchbook Pro on desktop.

Making color adjustments in Sketchbook Pro for desktop
In Sketchbook Pro, go to the menu bar and choose Image > Adjust to adjust the brightness/contrast, hue/saturation, color balance, grayscale, or invert values. For alternative color adjustment options, see Blending layers.
The canvas must contain some image data for adjustment options to be available, they will be greyed out on a blank canvas.
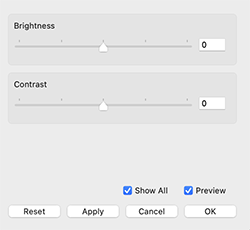
Show All
See all content on visible layers when Show All and Preview are enabled.
Preview
See real-time changes in the preview to the left as slider values are changed. When disabled, the preview doesn't update as values are changed.
Reset
Return the preview to the original settings, as long as Apply has not been used. If Apply was pressed, Reset restores the values to 0. If Apply has been pressed, the only way to undo the change is to use Undo.
Apply
Apply the settings to the image on your canvas, while keeping the dialog open for making further changes. Use this when setting a value beyond the slider's range. For example, the sliders have a range from -100 to 100. If you wanted to a value of -120, you would set the slider to -100, press Apply, then set the same slider to -20 and press OK when finished to close the dialog.
OK - Applies the changes and closes the dialog.
Cancel - Closes the dialog without applying the current unapplied changes.
Apply Hue to Grayscale Areas
Only available for Color Balance.
Apply color grayscale areas (areas that are white), when enabled. When disabled, these areas are not affected by the set hue and remain white.
Making color adjustments in Sketchbook for mobile devices
Do you want to make changes to your image, but without redoing the colors? If so, try the two color adjustment tools in the Layer Menu: HSL Adjustment and Color Balance.
Additional adjustment options are available with the Premium Bundle:
- Brightness/Contrast
- Grayscale
- Invert
- Blur
- Sharpen
To access adjustments, tap the Layer Menu and then choose  Adjust. A drop-down menu will show the available adjustments.
If you only want to apply the adjustment to a part of the layer, first make a selection and then open the Layer Menu to apply your adjustment.
HSL Adjustment
Use HSL Adjustment to make the content of a layer warmer, cooler, lighter, or darker.
The top slider changes the hue, the middle the saturation, and the bottom the luminance.
Color Balance
Select one of the following options from the top of your screen: Shadows, Midtones, and Highlights. Your selection determines which elements are affected by your changes.
Tap-drag the sliders. The top slider changes the reds, the middle slider affects the greens, and the bottom slider affects the blues.
Brightness/Contrast
Adjust the sliders to the right to increase the brightness and/or contrast of the pixels, or to the left to decrease.
Grayscale
Each pixel is reduced to only the Lightness value, producing an image in which the range of color is only black to white.
Invert
Converts the color information for each pixel to its complementary color.
Blur
Each point on the slider increases the blur radius by one pixel. You need to release the slider by removing your stylus or finger for the effect to be generated in the preview.
Sharpen
The sharpness slider defines the amount of contrast applied to the edges, and the strength slider increases the area that will be affected. You need to release the slider by removing your stylus or finger for the effect to be generated in the preview.