If the textures in the the default library don't produce the effect you're looking for, you can capture your own textures or shapes.
Once you’ve created a DIY brush, use Capture to add a texture and or shape.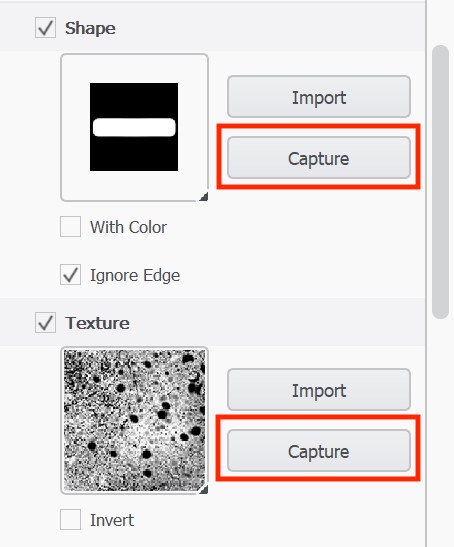
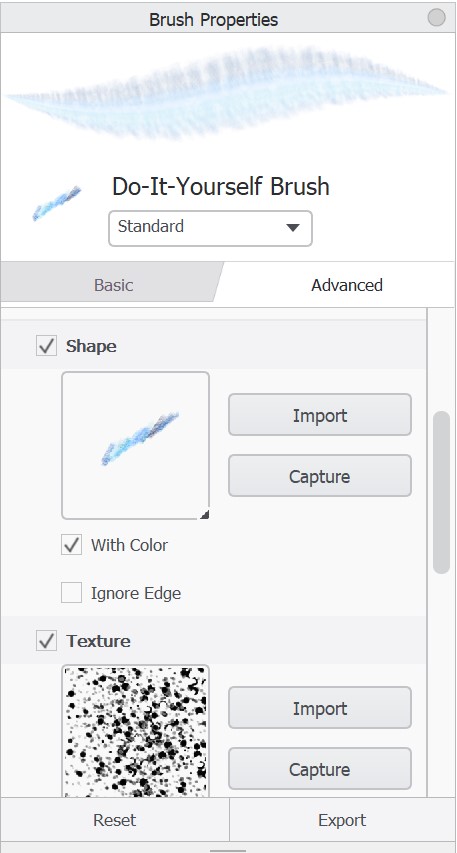
- In either the Brush Palette or Brush Library, double-tap a brush to open Brush Properties.
- In Brush Properties, tap the Advanced tab, scroll down to Nib and open it, scroll down to either Stamp or Texture
- Make sure the property (Stamp or Texture) you want to capture is checked
- Tap Capture. A prompt will appear at the bottom of the canvas, noting you are in Capture Mode
- In the canvas, as you pen/mouse over the area, a brush outline will appear. If it isn’t large enough to surround the area you want to capture, change the size of the brush with the Brush Puck or tap-hold the B key and drag within the canvas until it is.
- Tap the area to be captured as the stamp or texture. The display in Brush Properties will update to show the captured content.
Helpful Tips
When capturing a stamp texture, ensure all the strokes/paint you want included in your brush stamp are on the active layer. If you don’t want to merge all layers just for the sake of creating a brush, try duplicating the layers and merge the duplicates. Once you’ve captured the stamp, you can delete that duplicate layer.
You can set the shape and/or color and make a texture from a rotated stroke or capture something on your canvas to use as a texture. Before capturing a texture stamp, here are couple additional useful tips:
- To change the shape of the stamp, use Roundness. For an elliptical stamp, set Roundness to a low value.
- To rotate the stamp, in the Stamp section, under Rotation Dynamics, tap the arrow to select either Rotate to Stroke or Controlled by stylus tilt. Rotate to Stroke dynamically rotates the texture in the direction of the stroke.
- To capture the shape and color of the stamp, in the Texture section, tap the arrow next to Off and select Shape + Colors.
- To adjust the brush stamp, in the Stamp section, adjust the roundness, rotation, and spacing.
- To randomize the stamp, in the Randomize section, adjust size, flow, rotation, and spacing randomize.
- To change the brush edges, in the Edge section, adjust the hardness. Normally, the brush type you have selected determines this setting. To achieve certain effects, change it. Making the edges softer will create feathered brush edges, like with an airbrush. Harder edges are for markers or ballpoint pens. Maximum hardness is for a calligraphy pen on high-quality paper stock or lines from computer drafting software.
Keep in mind, some brushes, such as the Basics, don't have Advanced options. Therefore, they won't have options for capturing a texture.
Shape
When activated, Shape creates a texture brush that uses the captured or assigned shape, but with no assigned color (it grabs the alpha channel). Each time the texture brush is used, a different color can be set. This option works best for grabbing line work or for a series of strokes.
If you want to use the color of the captured shape, turn on With Color.
With Color
Depending on the brush selected, this option might not be available. In some versions of Sketchbook, once Shape is activated, you'll see the With Color option. In other versions, once you activate Shape and Texture, this option can be found under both. If With Color is grayed out, this indicates that option is not available for that particular brush.
When activated, the shape or texture will use the current paint color, as well as the selected shape or texture, to create your brush stamp.
If you want to capture something with multiple colors, activate Shape and With Color. Whenever the texture brush is used, it uses the shape you captured and the color set during creation.
With Shape and With Color, you can draw and render one component, capture it, and then lay down a stroke of identical components in sequence.
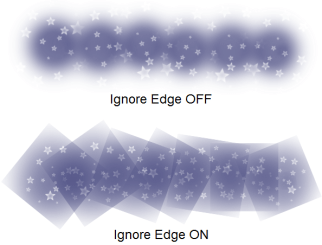
Ignore Edge
When you activate Ignore Edge (by adding a check), your brush stamp shape will not be round. You might also notice that the Edge options are grayed out, as a result.
When would I use Ignore Edge
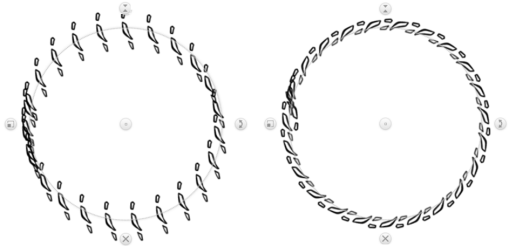
You might use Ignore Edge with the Ellipse tool and assortment of options in Brush Properties to create intricate designs. Start with Ignore Edge to help capture non-circular shapes. Then, use other options, such as Size, and in the Stamp section, Spacing, Rotation, and Rotate to Stroke, to adjust the orientation and size of the stamp. Here are examples of when you might use Ignore Edge:
- If you have a shape - such as a square - that would be cut off with a circular stamp
- If you want your shape to flow tightly around a corner.