Jump to Mobile
Use layer grouping to organize layers.
For example, when drawing a car you may want to group the layers with tires and hubcaps together, create another group for layers containing the body, headlights, windshield, etc., and a final one for interior components.
Grouping layers in Sketchbook Pro for desktop

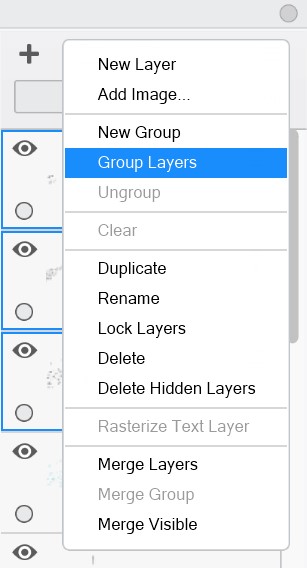
Layer grouping tools can be found in the second section of the Layer Menu.
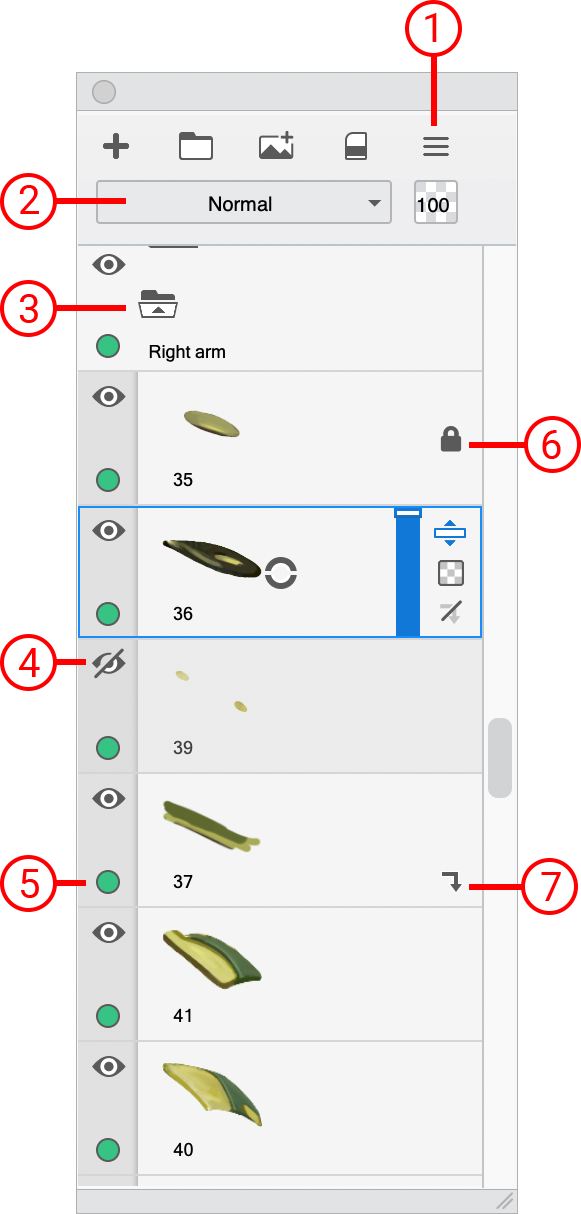
Here is an example of how groups of layers look in the Layer Editor:

- Layer menu
- Blend modes
- Group container expanded
- Layer visibility (show/hide)
- Color label
- Locked layer
- Clipping mask
Creating a layer group
There are three different ways to create a layer group, in the Layer Editor:
- Click
 Layer Menu and select New Group.
 - or, Click
 .
. - or, shift-select the layers you want grouped and click
 and select Group Layers.
To ungroup layers, select the group folder, click  and select Ungroup.
Adding a layer to a group
To add a layer to a group, click the layer’s handle  and drag it either onto the Group folder or over a layer within the group. A blue line will indicate where the layer will be positioned once you release it.
Showing/hiding a layer group
To hide the content in a layer group, tap  . Tap
. Tap  to display the content.
If you want to see some of the group content, you can hide individual layers within the group.
Colored layer or layer group assignments

Assign a color to a layer to makes it easier to distinguish one layer or group from another.
To assign a color, in the Layer Editor, with a layer or group selected, tap-hold  , then flick a color.
To unassign a color, select  .
.
Collapsing/Expanding a group
To collapse a group and hide its layers in the Layer Editor, tap  . When a group is collapsed, its icon changes to
  . Tap it to expand the group and see its layers.
Layer blending for groups
When a layer group has Pass Through set as the blend mode, any blend mode applied to a layer will affect all layers below it, including ones not in the group.
If the group is set to Normal, any blend mode applied to a layer within the group affects only layers in that group.
Grouping layers in Sketchbook for mobile devices
Creating a layer group
- Double-tap a layer that you want to be part of the new group. The Layer Menu will open.
- On the Layer Menu, tap
 Make Group
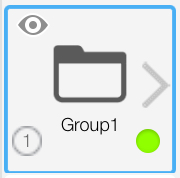
 - The Layer Menu will close and you will see your new Group folder in the Layer Editor
 |
|
Adding a layer to a group
To add a layer to a group, drag a layer up and over the group folder.
Showing/hiding a layer group
To hide the content in a layer group, tap  . Tap
. Tap  to display the content.
If you want to see some of the group content, you can hide individual layers within the group.
Colored layer or layer group assignments

Assign a color to a layer to makes it easier to distinguish one layer or group from another.
Double-tap the group folder to open the Layer Menu where you can assign a color in the Color Label drop-down.
To unassign a color, go back to the Layer Menu Color Label drop-down and select None.
Layer blending for groups
When a layer group has Pass Through set as the blend mode, any blend mode applied to a layer will affect all layers below it, including ones not in the group.
If the group is set to Normal, any blend mode applied to a layer within the group affects only layers in that group.
 to the right of the folder to enter the group and manage the individual layers