Jump to Mobile
Each version of Sketchbook has options for customizing the interface and/or tools. See the section below for the version you're using.
Customizing your UI in Sketchbook Pro for desktop
The icons in the Lagoon and tools found in the marking menus can be customized, along with the brushes in the Brush Palette. Move the tools you use the most to where you can get to them in a flick of your stylus. If you spend a lot of time in Sketchbook Pro, a few customizations can go a long way toward improving your productivity.
Don't forget, there are hotkeys to access tools quickly as well. You can customize those, too.
Customizing your desktop
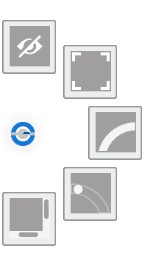
In the Lagoon, the first icon at the top  houses the Interface Controls. Use these to change your layout and set what interface elements are visible.
 Toggle UI – turns on (or off) visibility of all toolbars, windows, palettes, the pucks and the lagoon. When toggled off, you will see only the canvas, and the Interface Controls icon trigger for the lagoon. Alternatively, you can set the UI to automatically disappear when you draw using Auto Hide UI
 Toggle full screen – when in full screen mode, the title bar and Task bar (Windows) or Dock (Mac) are hidden.
 Lagoon Right – flips the lagoon to the right corner of the canvas. Toggles to Lagoon Left
 Toggle Lagoon – turns the Lagoon on and off
 Scroll Bars – turns canvas scroll bars on or off
I can't find my Layer Editor, Color Editor, or other UI elements
If you either can't find a UI element or window, or they are on one monitor while your canvas is on the other, here is a quick fix:
- In the menu bar, select Window > Default Layout. This will centralize things.
- Next, either open the editors you need through the toolbar or by selecting them from the Window menu.
Where's my title bar?
If your title bar is not visible, you can re-enable it with the hotkey combination Ctrl+Alt+J (Win) or Option+Command+J (Mac)
Customizing your lagoon
The Lagoon (the round UI element) by default is found in the bottom left corner of the canvas. This where you can find lots of useful tools. It is gesture driven, like the Layer Editor.

You can customize the Lagoon in Preferences
- For Windows users, select EditPreferences, then tap the Lagoon tab.
- For Mac users, select SketchbookPreferences, then tap the Lagoon tab.
Customizing marking menus
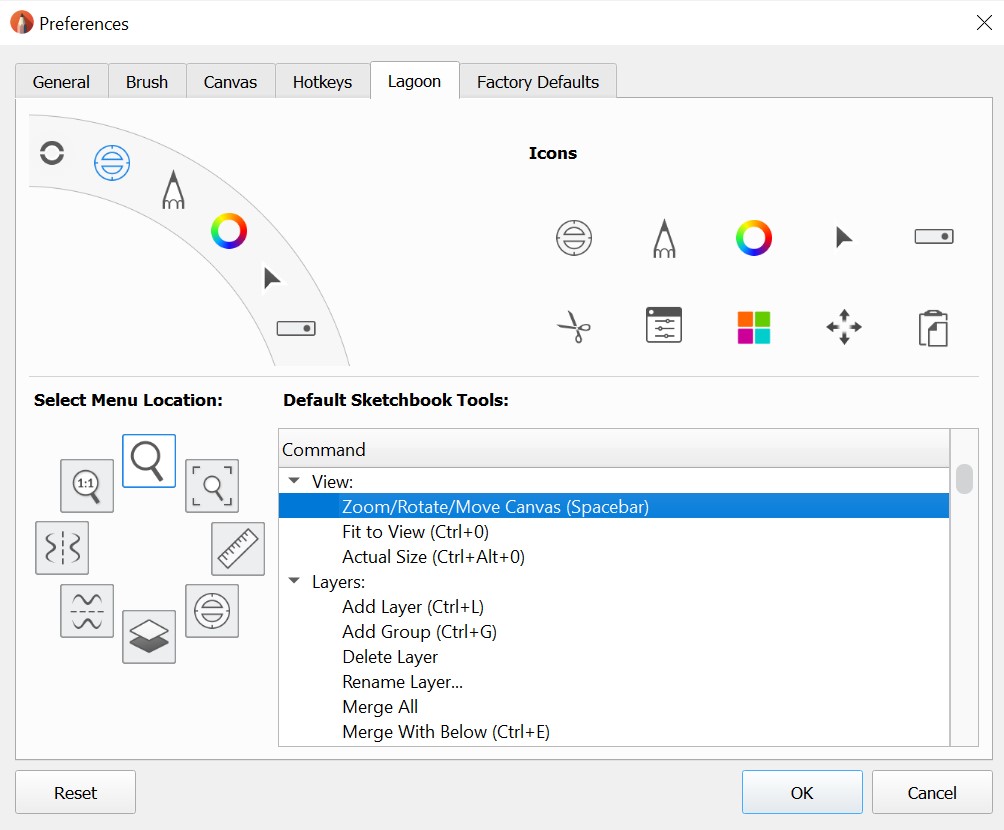
By default, the top marking menu icon is selected. In this case, it’s Zoom/Rotate/Move Canvas. In the Default Sketchbook Pro Tools list to the right, you’ll see that Zoom/Rotate/Move Canvas is selected. To change the tool assigned to this location in the marking menu, scroll through the list to find a new tool and click it. You can always revert back to default settings by tapping Reset in the bottom left corner.
Changing Lagoon icons
You can manually swap out or rearrange the existing Lagoon icons Once highlighted, select an icon from the list to the right.
The Lagoon WON'T update until you click OK and close the Preference window.
You cannot change the Interface Controls icon.
Once done, you can use hotkeys (1-6) or right-click to access these custom marking menus without visiting the Lagoon. If you have made any custom changes to the Lagoon marking menus, the hotkey assignment will have changed (based on your customization of the Lagoon). The new custom marking menus will always be pinned to those hotkeys. The only way to reset them is to tap Reset.
| Lagoon position | Mouse | Stylus |
|---|---|---|
|
First press 1, then right-click | Press-hold 1 and pen-down (left click) |
 |
First press 2, then right-click | Press-hold 2 and pen-down (left click) |
 |
First press 3, then right-click | Press-hold 3 and pen-down (left click) |
| First press 4, then right-click | Press-hold 4 and pen-down (left click | |
 |
First press 5, then right-click | Press-hold 5 and pen-down (left click) |
 |
First press 6, then right-click | Press-hold 6 and pen-down (left click) |
Naming custom brushes
When creating custom brushes, there are a few reasons it is important to assign names. The first is lagoon customization. Without names, you will have a hard time identifying your custom brushes from a list of Do-It-Yourself-Brushes and Do-It-Yourself-Brush copies. Once you've learned this the hard way and had to back-track to name these brushes in the Brushes marking menu, you'll see just how important this is. For instructions on how to do this, see Renaming brushes and brush sets.
Change the brush cursor
In Sketchbook Pro 9.0, to turn on or off the brush crosshair, in the title bar go to View > Brush Crosshair
In earlier versions of Sketchbook Pro and Autodesk Sketchbook, this option is found in the Brush tab of Preferences.
Note: if you have your device/stylus global settings set to the cursor OFF, turning on brush crosshair in Sketchbook Pro will have no effect. Sketchbook Pro will not override the global setting.
View the brush outline and/or brush stamp
By default, a brush outline appears for the sharpen, blur, and smear brushes, eraser, and other low-opacity brushes such as the airbrush. This circle shows you the brush size before you start drawing.
You can also turn on the option to show the brush stamp. This will show a preview of the brush texture or stamp as you hover your stylus.
In Sketchbook Pro 9.0, to turn on or off the brush outline, in the title bar go to View > Brush Outline
To turn on or off the brush stamp, in the title bar go to View > Brush Stamp
In earlier versions of Sketchbook Pro and Autodesk Sketchbook, these options are found in the Brush tab of Preferences.
Changing the language displayed in the UI
Sketchbook Pro is available in the following languages: English, Simplified Chinese, Traditional Chinese, French, German, Italian, Japanese, Korean, Brazilian Portuguese, Russian and Spanish.
If your device is set to a language that Sketchbook Pro does not support, the app will default to English. You can set a different language for Sketchbook Pro if you prefer.
On Windows you can change the language of Sketchbook Pro's UI in Preferences.
- In the first tab (General) of the window, select the Language option. There's a dropdown menu with the language choices.
- Select the language you want.
- Tap OK.
- A restart of Sketchbook Pro is required for this change to take effect. Close Sketchbook Pro, then relaunch it. The language changes will now be visible.
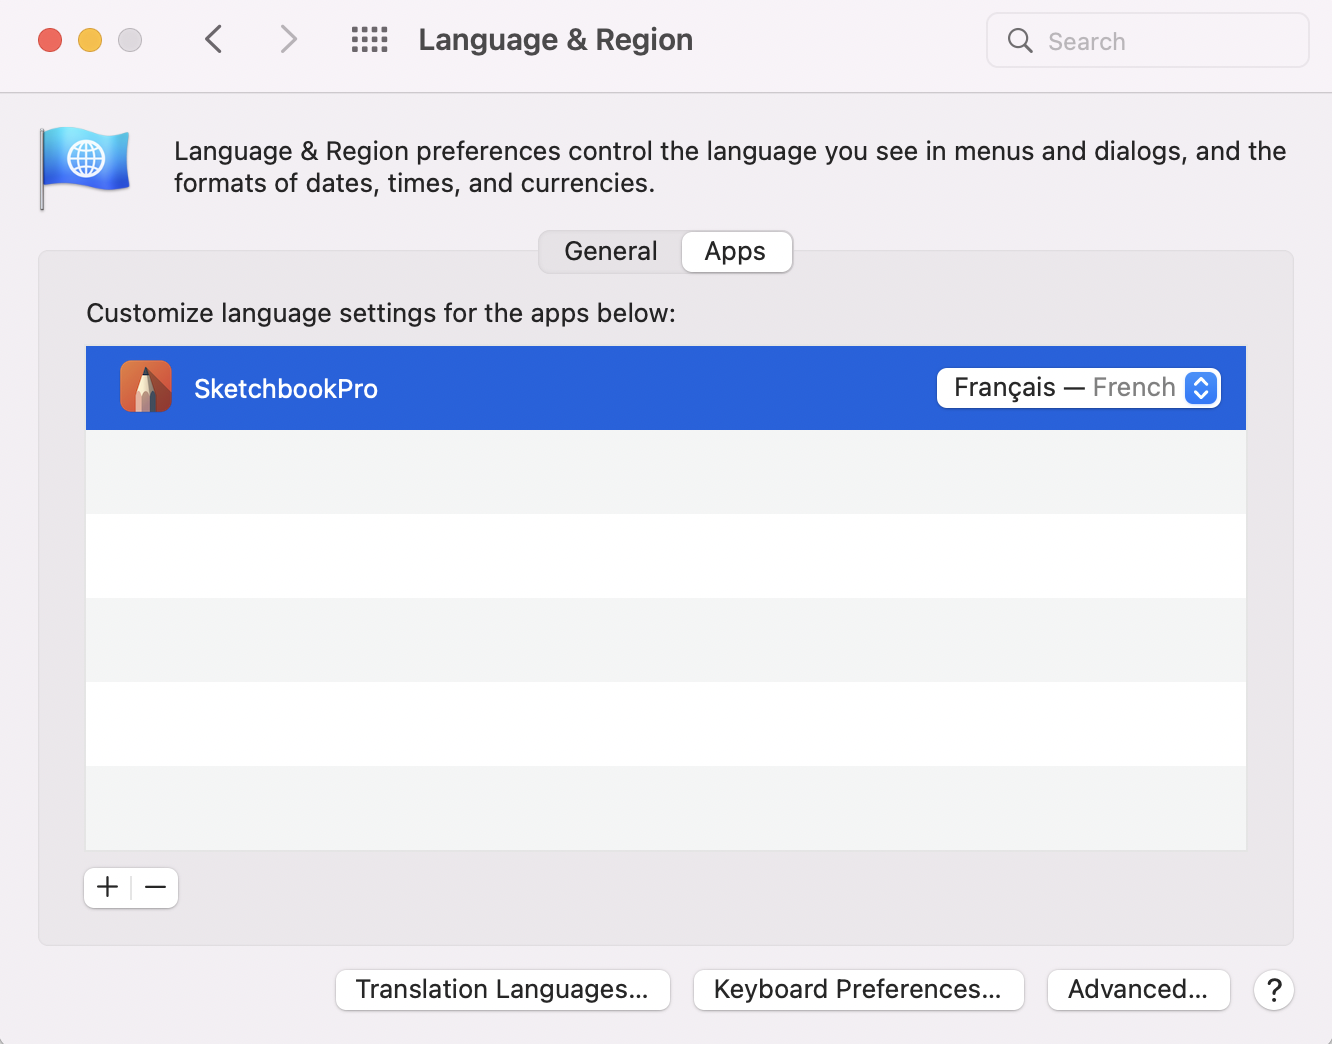
On macOS language preferences are defined in macOS System Preferences. You can set app-specific languages in the Language and Region dialog.
Customizing your UI in Sketchbook for mobile devices
If you spend a lot of time in Sketchbook, a few customizations can go a long way toward improving your productivity.
Customizing the UI can be done in Preferences. Tap  and select
  Preferences.
Gestures and menus for quick tool access
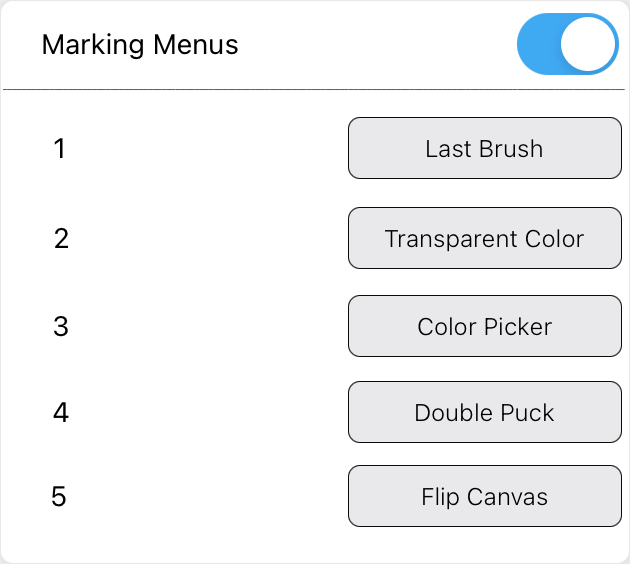
You can apply these tools to corner shortcuts, the marking menu, and tap and swipe gestures:
- Clear Layer
- Frame Canvas
- undo
- Redo
- Last Brush
- Last Color
- Transparent Color
- Brush Library
- Color Wheel (Color Editor)
- Full Screen
- Color Picker
- Flip Canvas
- Gallery
- Save to Gallery
Show/hide the status bar
If you prefer to see the status bar across the top of your screen showing information such as the time and battery available, you can toggle this option on. It will be off by default.

(New in Sketchbook version 6)
Show/hide tooltips
Tooltips appear briefly when you tap on a tool, showing the tool name. Tooltips are enabled by default, but you can disable them if you prefer.

Marking Menu
The marking menu is the quick-access menu enabled with the ![]() icon at the bottom center of the screen. Along with being able to customize which tools appear in the marking menu, you can also disable it entirely by toggling it off in Preferences.
icon at the bottom center of the screen. Along with being able to customize which tools appear in the marking menu, you can also disable it entirely by toggling it off in Preferences.
 (New in Sketchbook version 6)
Show Brush Panel
The Brush Panel was previously not available in the phone/handheld version of Sketchbook, but this option is available starting in Sketchbook version 6. It will be on by default, but it you prefer not to see it you can toggle it off. Tablet users have the same option.

(New in Sketchbook version 6)
Small Double Puck
Depending on the resolution of your device, you may prefer the Double Puck to appear smaller. This option will be off by default.

 |
 |
Double Puck |
Small Double Puck |
(New in Sketchbook version 6)
How to hide your UI
If you like to sketch without the visual clutter of the UI, you have a few options on how to hide and re-access the UI. See Hiding the UI while you draw for the details.
Changing the language displayed in the UI on Mobile
If you would like to change the language displayed in the app to something else, you can do this through the settings of your device.
iOS

On iOS, Sketchbook uses the language setting of the device. To change the app language, you must change your device's language settings.
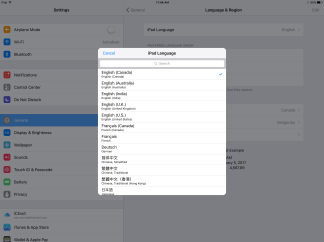
- On your device, open your Settings > General and scroll to the bottom of the page. Look for and tap Language & Region.
- Tap Language and select the language you want from there.
- Tap Done. A message appears asking if you would like the language settings changed.
- Tap Continue to change the displayed language.
Android
On Android, Sketchbook uses the language setting of the device. To change the app language, you must change your device's language settings.
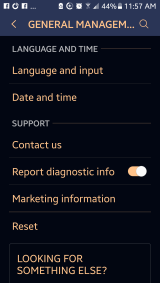
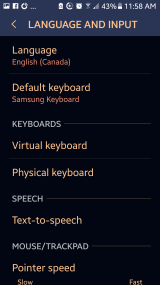
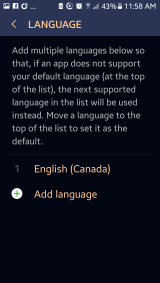
On your device, open your Settings > General Management and select Language and input, then Language. You might need to press Add language to load the one you want.